Panch Kedar Yatra in September and October — Complete Guide 2026
Planning the Panch Kedar Yatra in September or October means travelling during one of the best periods to explore the Garhwal Himalayas. The monsoon usually starts to retreat, the weather becomes clearer and the mountains look fresh and green.
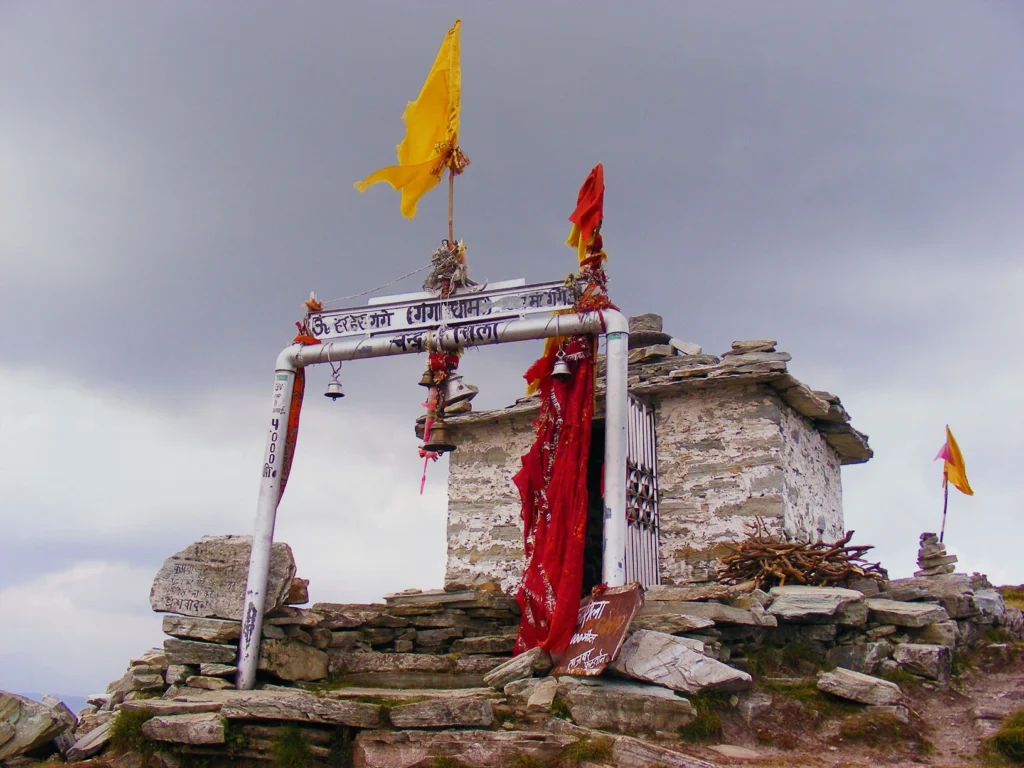
The Panch Kedar Yatra is not one single trek. It covers five Shiva temples—Kedarnath, Tungnath, Rudranath, Madhyamaheshwar and Kalpeshwar—with different routes, altitudes, trekking difficulty and temple closing dates.
In this complete guide, we cover everything you need to know before starting your Panch Kedar Yatra in 2026, including the best time to visit, weather, temple opening and closing dates, trek difficulty, route and itinerary, registration, accommodation, packing, travel costs and important tips for a safe and comfortable journey.
About Panch Kedar Yatra
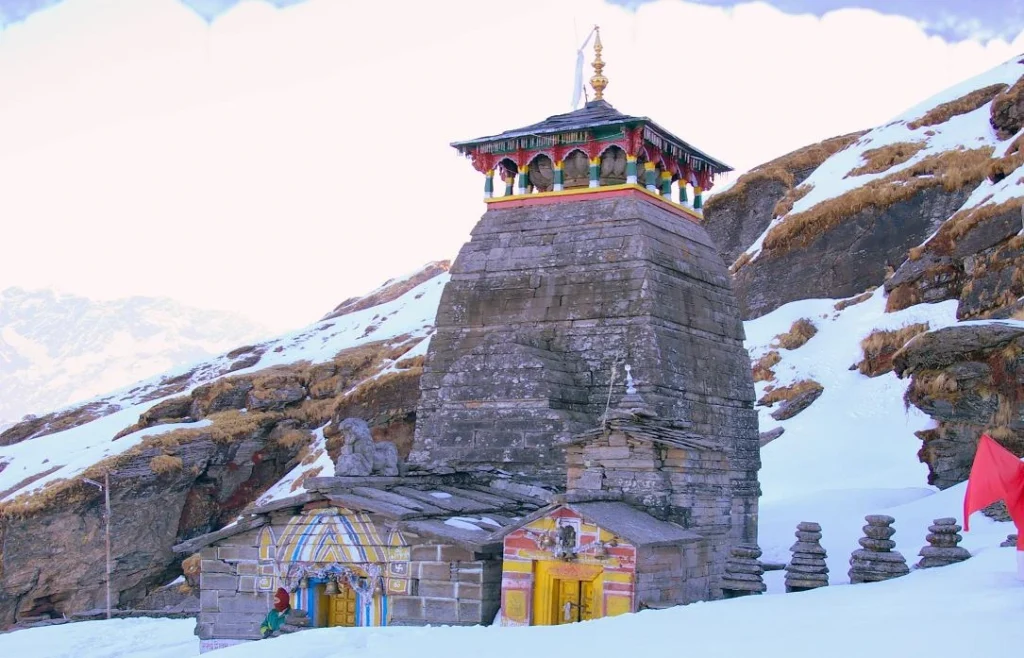
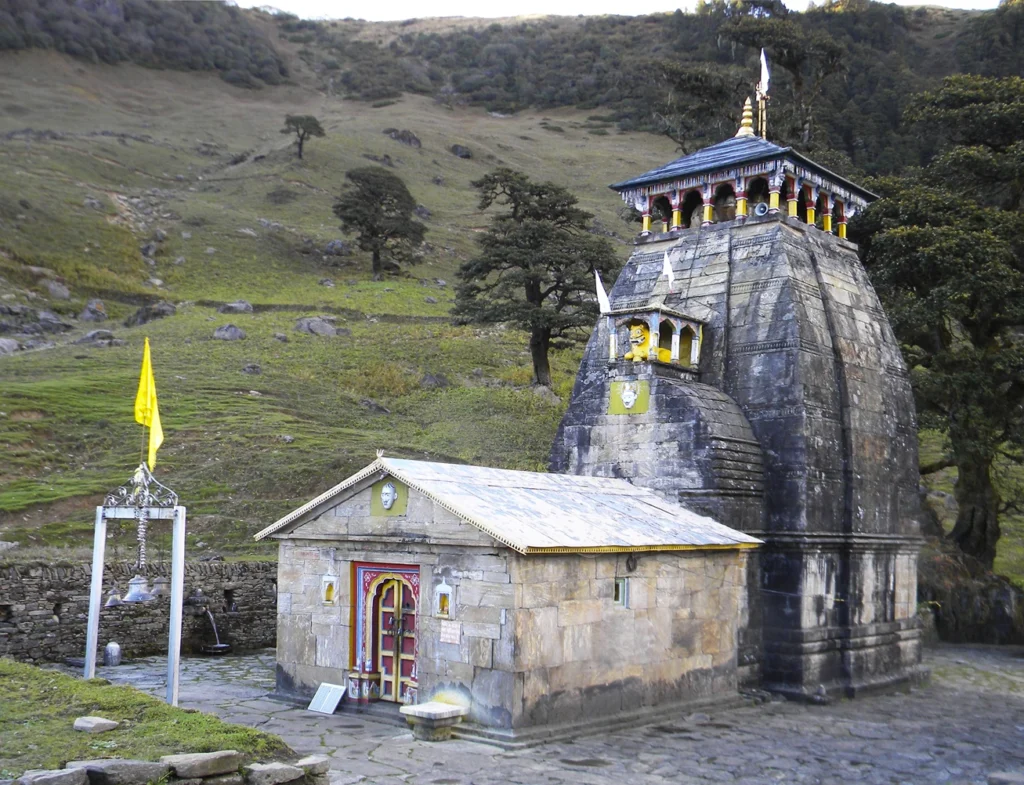
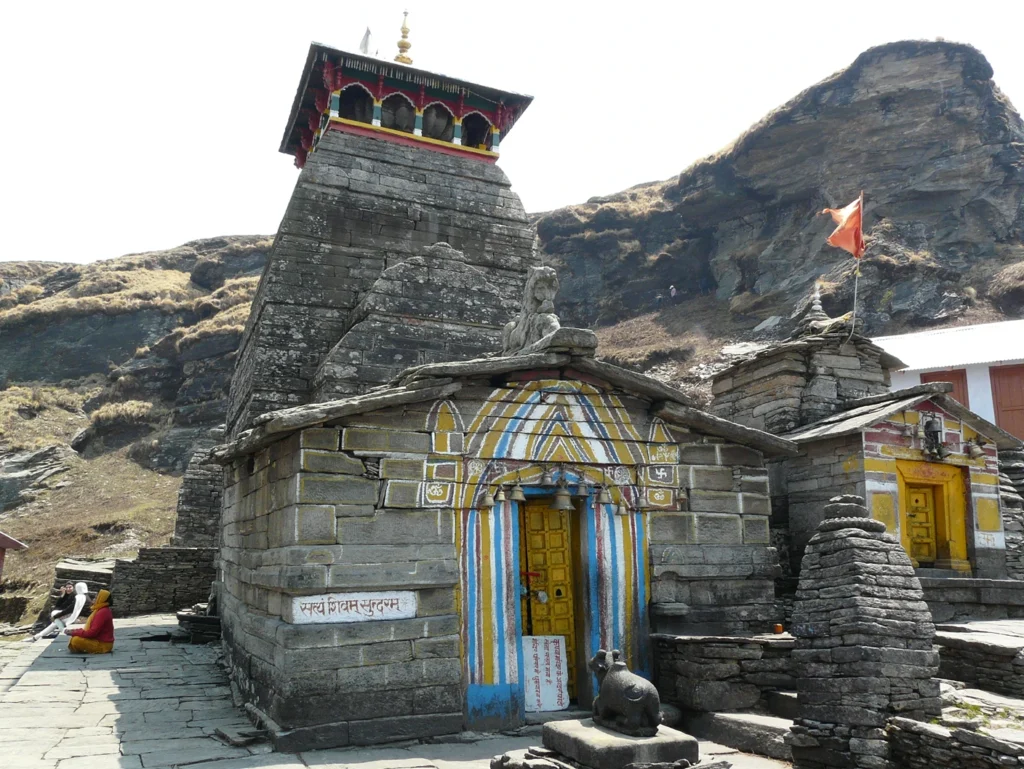
The Panch Kedar Yatra is a sacred pilgrimage covering five ancient Shiva temples in the Garhwal Himalayas of Uttarakhand — Kedarnath, Tungnath, Rudranath, Madhyamaheshwar and Kalpeshwar. According to Hindu tradition, each temple represents a different part of Lord Shiva’s divine form.
The traditional story of Panch Kedar is connected with the Pandavas after the Kurukshetra War. Seeking the blessings and forgiveness of Lord Shiva, the Pandavas travelled to the Himalayas in search of him.
According to legend, Shiva took the form of a bull and tried to remain hidden from the Pandavas. Bhima recognised him and attempted to catch him. As Shiva disappeared into the ground, different parts of his divine form are believed to have appeared at five different locations in the Garhwal Himalayas.
These places became the five sacred Panch Kedar temples:
Temple
Traditional Form of Shiva
Approx. Altitude
Kedarnath
Hump
3,583 m
Tungnath
Arms
3,680 m
Rudranath
Face
Around 3,600 m
Madhyamaheshwar
Navel and stomach
Around 3,490 m
Kalpeshwar
Hair or Jata
Around 2,200 m
For devotees, the Panch Kedar Yatra is therefore not only a Himalayan journey but also a pilgrimage associated with faith, devotion, repentance and perseverance.
If you are planning the Panch Kedar Yatra in October 2026, keep the winter closing dates of all five temples in mind. Each temple closes on a different date, so your itinerary should be planned according to the temple schedule.
Panch Kedar Temple Closing Dates 2026
Temple
Winter Closing Date 2026
Kedarnath
11 November 2026
Tungnath
4 November 2026
Rudranath
17 October 2026*
Madhyamaheshwar
20 November 2026
Kalpeshwar
Open throughout the year
Why We Prefer September-October for Panch Kedar Yatra
The Panch Kedar Yatra involves multiple treks, long mountain drives and visits to high-altitude temples, so choosing the right season can make the journey much more comfortable.
Our preference is mainly based on better trekking conditions after the monsoon, clearer mountain views and beautiful Himalayan scenery.
September — Fresh Green Mountains and Better Flexibility
September is a transition month when the monsoon usually starts to withdraw, but occasional rain is still possible, especially early in the month.
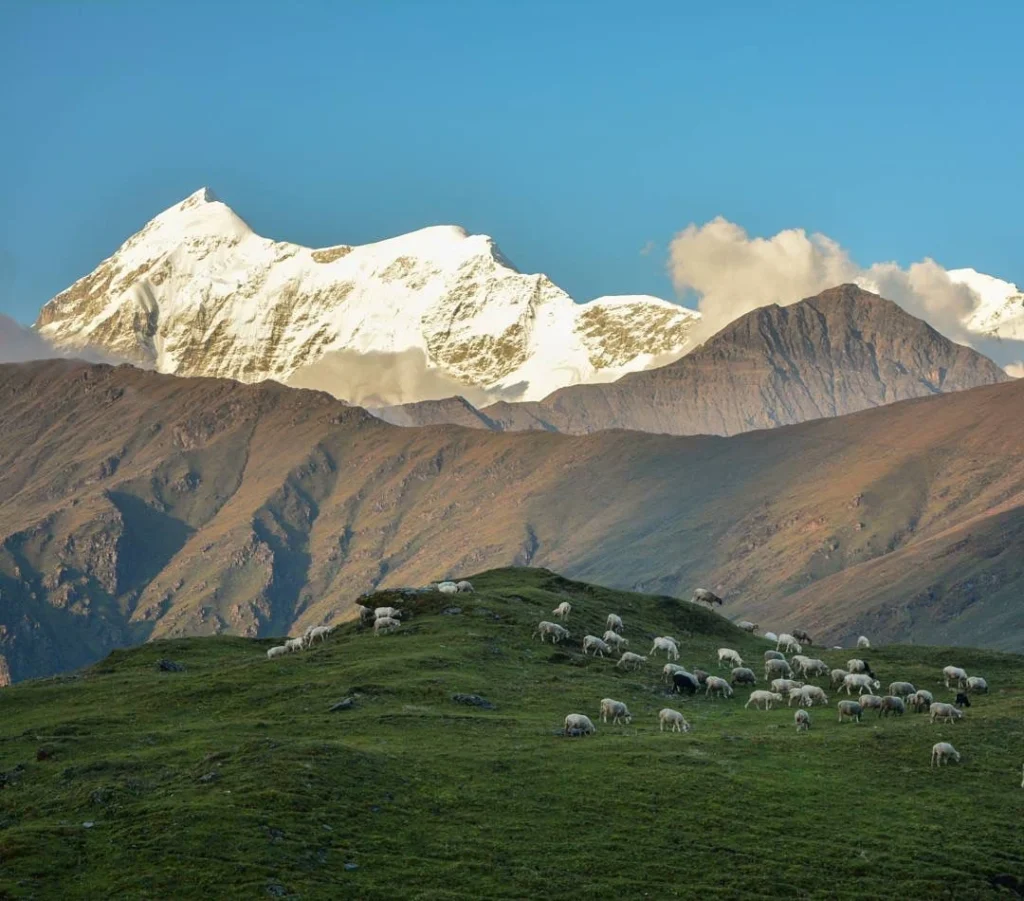
The mountains remain lush green and fresh, with full streams and waterfalls. Trekking temperatures are generally pleasant, but rain can make trails slippery and may cause delays on mountain roads.
If you are travelling in September, carry a rain jacket, waterproof backpack cover and good-grip trekking shoes, and keep some flexibility in your itinerary.
September is ideal if you want:
Green Himalayan landscapes
Pleasant trekking weather
Fresh waterfalls and streams
Less cold than later in autumn
The main thing to remember is that weather and road conditions can change quickly, so check the latest conditions before starting your journey.
October — Clearer Views and Pleasant Trekking Weather
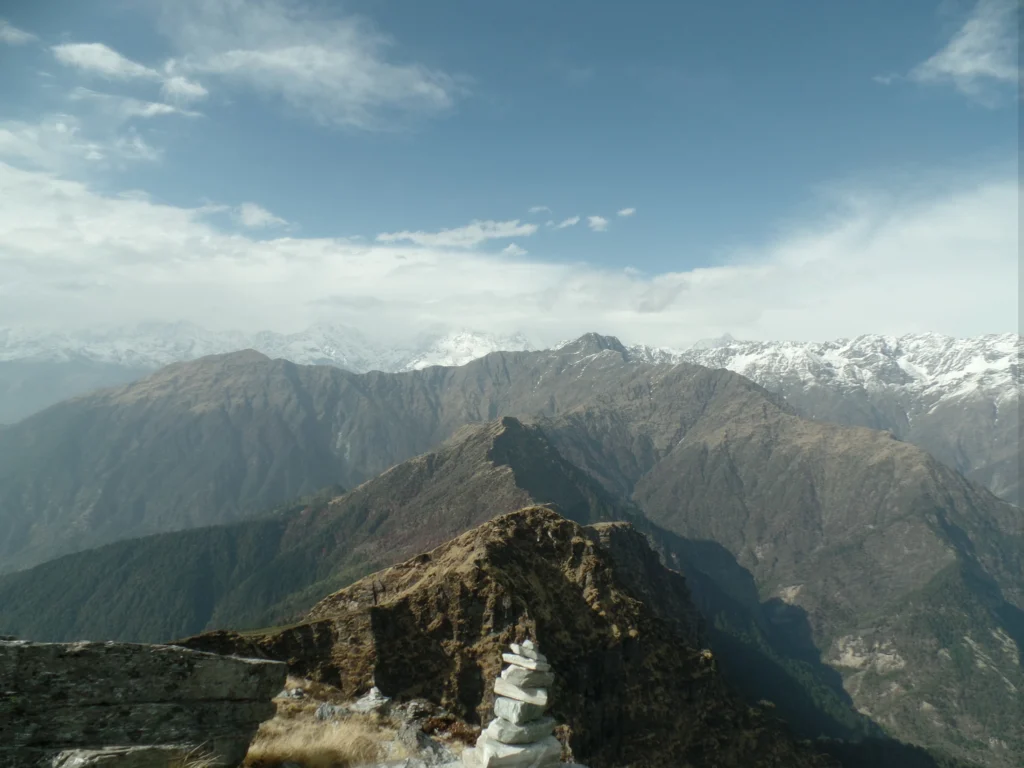
We also prefer October because the weather is generally drier and clearer. Mountain visibility often improves, the air becomes cooler and the Himalayan landscape starts changing into beautiful autumn colours.
These conditions are particularly good for long trekking days and enjoying the surrounding mountains. October is also an excellent month for photography because clearer skies can provide better views of the Himalayan peaks.
The main thing to remember is that temperatures drop considerably at night, especially at higher-altitude trekking locations. Warm layers and proper cold-weather clothing are therefore important.
For trekking, the practical benefits are:
Better visibility after the monsoon.
Cooler daytime temperatures.
Pleasant conditions for long walking days.
Fresh greenery in September.
Clearer skies and autumn landscapes in October.
Good conditions for photography.
Lower risk of extreme summer heat.
One Important Thing to Keep in Mind
Although September and October are our preferred months, post-monsoon does not mean completely risk-free weather. Rain can still occur, and heavy showers may cause landslides or temporary problems on mountain roads. Trekking trails can also become slippery after rainfall.
October also requires more careful planning because some Panch Kedar temples close for the winter season earlier than others.
Overall, We would recommend you to choose September to early or mid-October for Panch kedar yatra.
Panch Kedar Closing Dates – You Need to Plan Before
Panch Kedar Closing Dates 2026 — Plan Before You Book
If you are planning the Panch Kedar Yatra in October, check the winter closing dates before booking your transport or fixing your itinerary.
For 2026, the currently published schedule is:
Temple
2026 Opening
2026 Closing
Kedarnath
22 April
Around 11 November*
Tungnath
2 May
Around 4 November*
Rudranath
18 May
17 October
Madhyamaheshwar
21 May
Around November*
Kalpeshwar
Year-round
Year-round
Weather & Temperature by Temple (Sept-Oct)
If you are planning the Panch Kedar Yatra in October, check the winter closing dates before booking your transport or fixing your itinerary.
For 2026, the currently published schedule is:
Temple
2026 Opening
2026 Closing
Kedarnath
22 April
Around 11 November*
Tungnath
2 May
Around 4 November*
Rudranath
18 May
17 October
Madhyamaheshwar
21 May
Around November*
Kalpeshwar
Year-round
Year-round
Panch kedar yatra Difficulty by Temple
The Panch Kedar circuit is not a beginner-level single trek. It combines several treks with different terrain and altitude.
A practical difficulty comparison is:
Temple
Approx. Trek
Difficulty
Kedarnath
16–18 km one way
Moderate to Difficult
Tungnath
3.5 km one way
Easy to Moderate
Rudranath
Around 18–20 km depending on route
Difficult
Madhyamaheshwar
Around 19 km one way
Moderate to Difficult
Kalpeshwar
Short walk from road/roadhead
Easy to Moderate
1. Kedarnath — Moderate to Difficult
The Kedarnath Trek is around 16–18 km one way, depending on the route and current starting point. The trail is well established and receives many pilgrims, but the long distance and continuous ascent make it physically demanding.
The higher sections can feel tiring because of the altitude, and the final part of the trek can be particularly challenging. Good stamina and regular walking practice are recommended.
Difficulty: Moderate to Difficult
2. Tungnath — Easy to Moderate
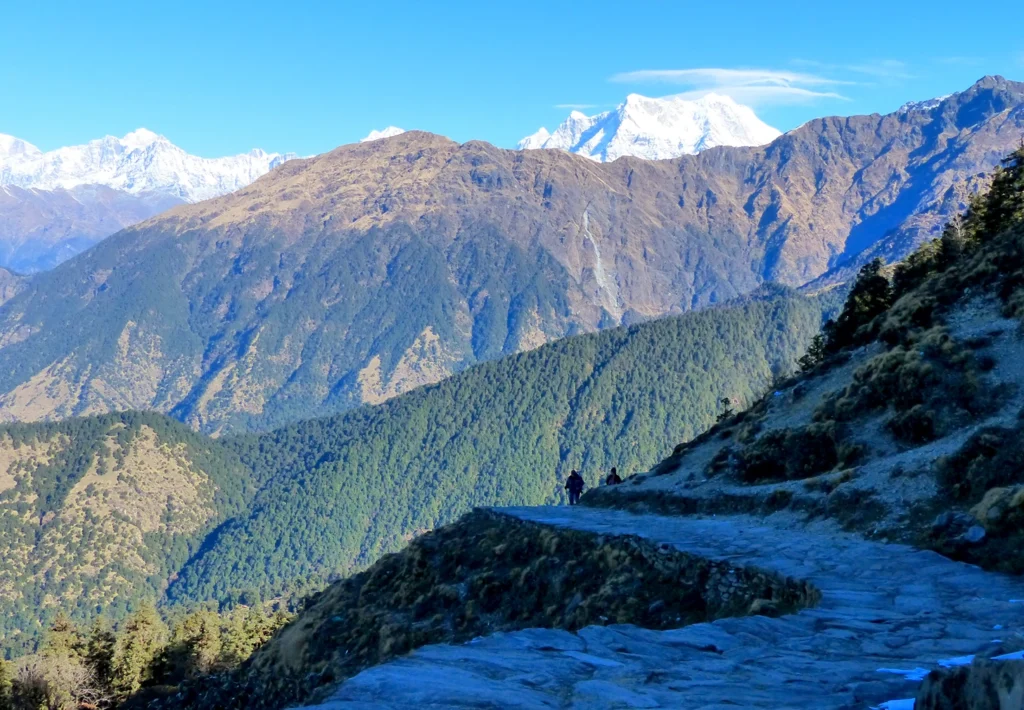
Tungnath has the shortest trek among the main high-altitude Panch Kedar routes, at around 3.5 km one way from Chopta. The trail is clearly marked and commonly used by trekkers and pilgrims.
However, the route is steep in places, and Tungnath is located at around 3,680 metres, so the climb can feel harder than the short distance suggests.
Difficulty: Easy to Moderate
3. Rudranath — Difficult
Rudranath is one of the toughest Panch Kedar treks. Depending on the route, the trek can involve around 18–20 km of walking, along with steep sections, forests, meadows and remote mountain trails.
The route is more demanding than Tungnath and requires good endurance. Changing weather and trail conditions can also make the journey more challenging.
Difficulty: Difficult
4. Madhyamaheshwar — Moderate to Difficult
The Madhyamaheshwar Trek is around 19 km one way from the roadhead, making it one of the longer Panch Kedar routes.
The trail includes several uphill and downhill sections, and the long walking distance can be tiring. The final approach also involves a significant climb, so good stamina is important.
Difficulty: Moderate to Difficult
5. Kalpeshwar — Easy to Moderate
Kalpeshwar is the easiest Panch Kedar in terms of trekking distance. The temple is located close to the roadhead, so the walking section is much shorter than the other four Kedars.
However, the journey still involves mountain roads and uneven terrain, so basic fitness and comfortable walking shoes are recommended.
Difficulty: Easy to Moderate
Panch Kedar Yatra Itinerary including Badrinath Dham visit
We recommend this 12-day Panch Kedar Yatra itinerary with Badrinath Dham for trekkers who are reasonably fit and comfortable with consecutive trekking days.
Day 1: Haridwar/Rishikesh to Guptkashi
Drive: Around 190–200 km Travel Time: 7–9 hours Altitude: Guptkashi – around 1,300 m Stay: Hotel in Guptkashi
We start our journey from Haridwar or Rishikesh and drive towards Guptkashi. During the journey, you will pass through beautiful mountain valleys and important places such as Devprayag and Rudraprayag.
We keep this day mainly for road travel and rest. After reaching Guptkashi, check in to your hotel, have dinner and get ready for the Kedarnath Trek the next morning.
Overnight Stay: Guptkashi
Day 2: Guptkashi → Gaurikund → Kedarnath
Drive: Around 30 km to Gaurikund Trek: Around 16–18 km Walking Time: 7–9 hours Altitude: Kedarnath – 3,583 m Stay: Guesthouse/Dharamshala in Kedarnath
We start early from Guptkashi and drive to Gaurikund, the starting point of the Kedarnath Trek.
From Gaurikund, we begin our long uphill walk towards Kedarnath Dham. We recommend walking at a comfortable pace and taking regular breaks rather than trying to cover the distance quickly.
After reaching Kedarnath, you can check in, rest and attend Kedarnath Temple darshan according to the temple timings and crowd conditions.
Overnight Stay: Kedarnath
Day 3: Kedarnath → Gaurikund → Chopta
Trek: Around 16–18 km downhill Walking Time: 6–8 hours Drive: Gaurikund to Chopta – around 4–5 hours Altitude: Chopta – around 2,680 m Stay: Hotel/Camp in Chopta
We start early and trek back from Kedarnath to Gaurikund. After reaching Gaurikund, our vehicle takes us towards Chopta.
This is a long day because you will complete the Kedarnath descent and then continue by road. Once we reach Chopta, you can check in, relax and prepare for the next day’s Tungnath Trek.
Overnight Stay: Chopta
Day 4: Chopta → Tungnath → Chandrashila → Chopta
Trek: Around 7–8 km round trip Walking Time: 4–6 hours Altitude: Tungnath – around 3,680 m **Chandrashila – around 4,000 m Stay: Hotel/Camp in Chopta
We start early from Chopta and trek towards Tungnath Temple. The trail is short compared with Kedarnath, but it is a continuous uphill climb.
After Tungnath darshan, trekkers who are feeling comfortable and if the weather is suitable can continue towards Chandrashila. After enjoying the Himalayan views, we trek back down to Chopta.
If you do not want to continue to Chandrashila, you can return after Tungnath darshan.
Overnight Stay: Chopta
Day 5: Chopta → Sagar/Gopeshwar → Rudranath Route
Drive: Around 4–6 hours Stay: Village stay/Camp
After breakfast, we leave Chopta and drive towards the Rudranath route through the Gopeshwar/Sagar side.
We use this day to reach the appropriate roadhead for the Rudranath Trek. The exact roadhead and overnight location can depend on the route being used and the current road conditions.
After reaching the village or campsite, we organise our trekking requirements and take proper rest because the next day is one of the longest trekking days of the yatra.
Overnight Stay: Village/Camp near Rudranath route
Day 6: Trek to Rudranath
Trek: Around 18–20 km, depending on route Walking Time: 8–10 hours Altitude: Rudranath – around 3,600 m Stay: Basic Guesthouse/Camp
We start early for the Rudranath Trek.
This is one of the toughest sections of the Panch Kedar Yatra. The route takes us through forests, meadows and remote Himalayan terrain, with several uphill and downhill sections.
We recommend keeping a steady pace, carrying enough water and avoiding unnecessary weight in your backpack.
After reaching Rudranath, we settle into our basic accommodation and complete darshan according to the available temple timings.
Overnight Stay: Rudranath
Day 7: Rudranath Darshan → Descent
Walking Time: Around 6–9 hours Trek Distance: Depends on selected route Stay: Village Stay/Guesthouse
We start the morning with Rudranath Temple darshan if it was not completed the previous evening.
After darshan, we begin our descent towards the selected village or roadhead. The distance for this day depends on the route and overnight arrangement.
After reaching the lower area, we rest and prepare for the next major trekking section towards Madhyamaheshwar.
Overnight Stay: Village/Guesthouse
Day 8: Roadhead → Madhyamaheshwar
Trek: Around 16–19 km Walking Time: 7–9 hours Altitude: Madhyamaheshwar – around 3,490 m Stay: Guesthouse/Camp near Madhyamaheshwar
We drive towards the Ransi/Gaundar side and begin our trek to Madhyamaheshwar Temple.
The trail passes through mountain villages, forests and beautiful Himalayan landscapes. The long distance and uphill sections make this another physically demanding day.
We walk at a comfortable pace and take regular breaks before reaching Madhyamaheshwar.
Overnight Stay: Madhyamaheshwar
Day 9: Madhyamaheshwar Darshan → Descent
Trek: Around 16–19 km Walking Time: 6–8 hours Stay: Guesthouse/Hotel in the lower valley
We start the morning with Madhyamaheshwar Temple darshan.
After darshan, we begin our descent towards the lower valley and roadhead. Although the return journey is downhill, it can still be tiring after several days of trekking, so we recommend taking care of your knees and maintaining a steady pace.
Once we reach the roadhead, we rest for the night.
Overnight Stay: Lower Valley
Day 10: Lower Valley → Urgam → Kalpeshwar
Drive: Around 5–7 hours Walking: Short walk to Kalpeshwar Temple Altitude: Kalpeshwar – around 2,200 m Stay: Homestay/Guesthouse in Urgam Valley
After breakfast, we continue towards Urgam Valley and Kalpeshwar.
Kalpeshwar is the fifth and final Panch Kedar temple. Unlike the other four, it is located at a lower altitude and remains open throughout the year.
After reaching the area, we take the short walking route to Kalpeshwar Temple for darshan. After visiting the temple, we return to our stay and relax.
Overnight Stay: Urgam Valley
Day 11: Kalpeshwar → Badrinath Dham
Drive: Around 5–7 hours Altitude: Badrinath – around 3,133 m Stay: Hotel/Guesthouse in Badrinath
After breakfast, we leave Urgam Valley and drive towards Badrinath Dham.
This is mainly a road-travel day, so we keep some flexibility in the schedule. Mountain travel can take longer than expected because of traffic, weather and road conditions.
After reaching Badrinath, we check in to the hotel. If the temple timings allow, we can attend Badrinath Dham darshan the same evening.
Overnight Stay: Badrinath
Day 12: Badrinath Darshan → Haridwar/Rishikesh
Drive: Around 320–330 km Travel Time: Approximately 10–12 hours Stay: Journey Ends
We start the morning with Badrinath Dham darshan if it was not completed the previous evening.
After darshan, we begin our return journey towards Haridwar or Rishikesh. It is a long mountain drive, so we recommend starting early and keeping enough time for meals and rest breaks.
After reaching Haridwar/Rishikesh, your Panch Kedar Yatra with Badrinath Dham comes to an end.
What to Pack for Panch Kedar Yatra ?
Packing for the Panch Kedar Yatra in September and October should cover both rain and cold weather. Since the yatra includes multiple trekking sections and high-altitude areas, keep your luggage light and practical.
Essential Packing List
High-ankle trekking shoes with good grip
Waterproof rain jacket/poncho
Backpack rain cover and dry bags
Thermal innerwear
Fleece and warm down/synthetic jacket
2–3 trekking trousers and quick-dry T-shirts
Woollen socks and gloves
Woollen cap and sun cap
UV-protection sunglasses and sunscreen
Trekking poles
Headlamp with spare batteries
Water bottles and ORS/electrolytes
Personal medicines and basic first-aid kit
Power bank and charging cable
Toiletries, tissues and small towel
ID and other required travel documents
Lightweight snacks such as dry fruits or energy bars
Pack According to the Month
September: Prioritise rain protection and waterproofing, as occasional showers are still possible.
October: Carry more warm layers, especially for cold mornings and nights at higher altitudes.
Avoid carrying a large suitcase during trekking sections. Keep your main luggage for road travel and carry only the essentials in a 20–30 litre trekking backpack.
Our tip: Instead of carrying too many clothes, use a layering system. It keeps you warm without adding unnecessary weight to your backpack.
What Registration & Permits Required ?
Before starting your Panch Kedar Yatra with Badrinath, the required registrations and permits need to be completed. Registration requirements can vary depending on the temple, trekking route and current government rules.
For Kedarnath and Badrinath, the applicable Char Dham/Yatra registration and valid government ID are generally required. Some trekking routes, particularly Rudranath and Madhyamaheshwar, may also have local or forest permission requirements.
If you are trekking with Roopkund Heaven, we take care of the required registrations, permits and local documentation for you. You only need to provide the required ID proof and documents before the trip, and we handle the rest.
Accommodation Facilities During Panch Kedar Yatra
During our Panch Kedar Yatra, we arrange accommodation according to the location and trekking route. We provide comfortable hotels or guesthouses at accessible destinations, while remote trekking sections may include simple guesthouses, village stays or camps.
At places like Kedarnath, Chopta, Gopeshwar and Badrinath, we arrange suitable accommodation where you can relax and recover after the day’s journey. On remote routes such as Rudranath and Madhyamaheshwar, facilities are more basic because of the terrain and limited infrastructure. At remote locations, facilities such as hot water, electricity and mobile networks may be limited.
We clearly mention where you will stay each night in the itinerary, so you can understand the accommodation arrangements before starting your yatra.
Our priority is to provide you with a clean, safe and comfortable place to rest after a long trekking day, rather than promising facilities that may not be available in remote Himalayan areas.
Practical Tips for Panch Kedar Yatra
Keep these important points in mind before starting your Panch Kedar Yatra:
Start Early: Begin long trekking days early to get more daylight and enough time for breaks.
Build Fitness: Prepare with regular walking, stair climbing and weekend hikes before the yatra.
Do Not Underestimate Rudranath: It is one of the toughest sections, so save enough energy for this trek.
Maintain a Steady Pace: Walk comfortably and avoid rushing, especially at higher altitudes.
Stay Hydrated: Drink water regularly and carry ORS or electrolytes.
Watch for Altitude Symptoms: Headache, nausea, dizziness or unusual breathlessness should not be ignored. Inform your trek leader immediately.
Keep Buffer Days: Rain, landslides, roadblocks or trail conditions can cause delays.
Check Temple Closing Dates: October travellers should especially check the closing dates of all panch kedar temples. For 2026, the currently published schedule is Rudranath – 17 October, Tungnath – around 4 November, Kedarnath – around 11 November, Madhyamaheshwar – around 20 November, and Kalpeshwar – open throughout the year.
Check Local Conditions: Confirm the latest weather, road and trail conditions before starting remote sections.
Pack Light: Carry only essential trekking gear and use a comfortable backpack.
Carry Cash: UPI and card payments may not work reliably in remote areas.
Keep Electronics Charged: Carry a power bank and download important maps, contacts and booking details offline.
Carry Basic Medicines: Keep personal medicines, first-aid supplies and blister care easily accessible.
Be Ready for Simple Facilities: Remote areas may have limited electricity, hot water, network and food options.
Follow Your Trek Leader: Follow instructions regarding pace, route, weather and safety throughout the trek.
Respect Nature and Temples: Avoid littering and follow local rules and religious customs.
Keep Your Itinerary Flexible: Do not plan tight connections immediately after the yatra. Allow time for unexpected mountain delays.
Our advice: Prepare well, walk at your own pace and keep some flexibility. The Panch Kedar Yatra is a challenging Himalayan journey, and good planning makes it much more comfortable and enjoyable.
FAQs
1. What is the best time for Panch Kedar Yatra?
May to June and September to October are the main trekking seasons. For better post-monsoon weather and clearer Himalayan views, September and October are excellent months.
2. Can I do Panch Kedar Yatra in October?
Yes. However, check the temple closing dates before booking because the five temples close on different dates. Rudranath closes earlier, on 17 October 2026.
3. What are the Panch Kedar temple closing dates in 2026?
The currently published dates are Rudranath – 17 October, Tungnath – around 4 November, Kedarnath – around 11 November, Madhyamaheshwar – around 20 November, and Kalpeshwar – open throughout the year. Confirm the latest dates before your trip.
4. Which is the toughest Panch Kedar trek?
Rudranath is generally one of the toughest because of its long, remote and demanding trekking route. Madhyamaheshwar is also physically challenging.
5. Which Panch Kedar temple is easiest to reach?
Kalpeshwar is generally the easiest to reach because of its lower altitude and shorter walking approach. It is also open throughout the year.
6. Is Panch Kedar suitable for beginners?
A complete Panch Kedar Yatra is not recommended for completely unprepared beginners. It involves multiple long trekking days and high-altitude routes. Proper fitness preparation is important.
7. How many days are required for the Panch Kedar Yatra?
A complete Panch Kedar Yatra generally takes 12–16 days, depending on the route, trekking pace, road conditions and buffer days.
8. What is the total Panch Kedar trek distance?
There is no single fixed distance because each temple has a separate route. The main trekking sections range from the short Tungnath trek of about 3.5 km to longer routes such as Rudranath and Madhyamaheshwar.
9. Can I do Panch Kedar Yatra in September?
Yes. September is an excellent post-monsoon month, especially for green landscapes and pleasant trekking conditions. Early September can still receive rain, so carry proper rain protection.
10. Is October better than September for Panch Kedar?
October is better for clearer skies and Himalayan views, while September offers greener landscapes. October is colder, and temple closing dates become more important.
11. What should I pack for Panch Kedar Yatra?
Carry good trekking shoes, rain protection, warm layers, gloves, cap, sunglasses, sunscreen, trekking poles, personal medicines, water bottles, snacks, headlamp and power bank. Pack more rain protection in September and warmer clothing in October.
Chopta Tungnath Trek with Kids and Family — Complete Guide
Are you planning a Chopta Tungnath Trek with kids or senior citizens? You may be wondering if they can manage the uphill climb, whether the trail is safe, and what kind of stay and facilities are available in Chopta.
In this guide, we cover everything you need to know before planning your trip, including trek difficulty, safety, fitness, accommodation, ponies and palanquins, the best time to visit, travel options, Family-Friendly package, and useful tips for a comfortable journey.
Why Chopta Tungnath Is One of the Best Family-Friendly Treks in India
The ancient Tungnath Temple is one of the Panch Kedar temples and is known as the highest Shiva temple in the world. Located at around 12,000 feet, the temple is surrounded by beautiful Himalayan mountains. Families can walk slowly, take breaks and enjoy the views along the way. The trail is mostly stone-paved and easy to follow, with no technical climbing or rope sections.
The Chopta Tungnath Trek is a good choice for families because it does not require several days of trekking. A road reaches Chopta, and from there, the trek to Tungnath is about 3.5–4 km one way. It usually takes around 2–3 hours, depending on your walking speed and how many breaks you take.
The trail is mostly stone-paved and easy to follow. There is no technical climbing or rope section. Families can walk at a comfortable pace, take breaks and enjoy the mountain views along the way.
For children and senior citizens who may find the climb difficult, ponies and palanquins may be available on route, depending on local conditions. After visiting Tungnath Temple, you can continue another 1.5 km to Chandrashila Summit if you feel comfortable. This part of the trail is steeper, so it is better to continue only if you are fit enough.
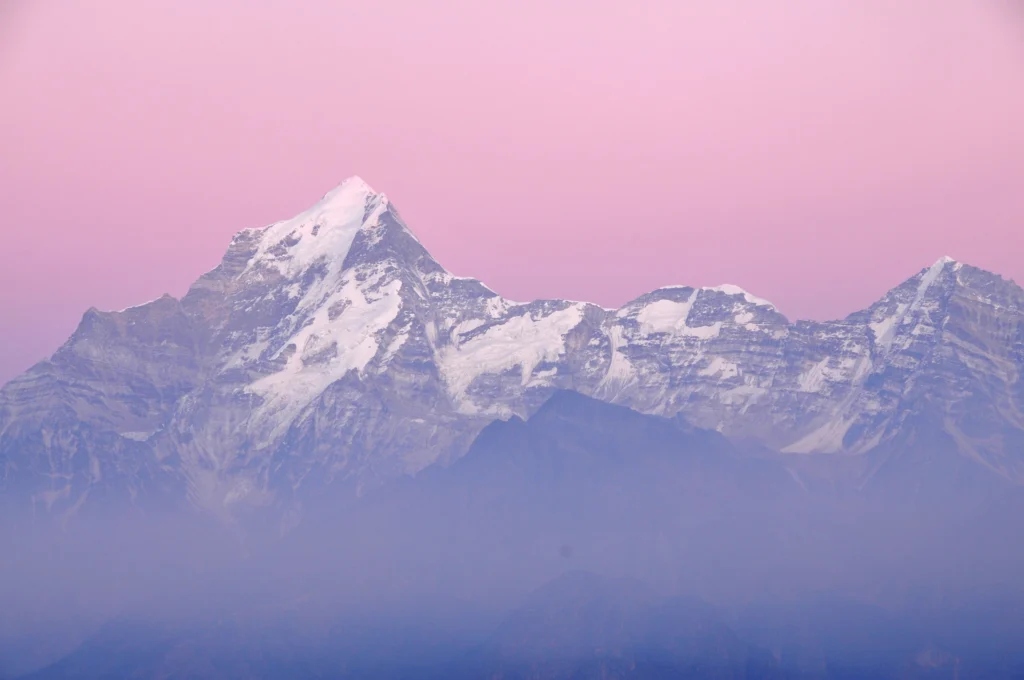
From Chandrashila, you can enjoy beautiful views of the Himalayas, including peaks such as Nanda Devi, Trishul and Chaukhamba.
Enjoy Nature Around Chopta
The Chopta region is not just about trekking. You can also visit Deoriatal Lake, a peaceful mountain lake surrounded by forests and mountain views.
Chopta is also known for its green meadows, pine and rhododendron forests, and Himalayan birds such as the Himalayan Monal. Children can enjoy birdwatching, exploring the surroundings and spending time in nature.
Comfortable Stay for Families
Another advantage is that families can find accommodation in Chopta. Hotels, guesthouses, camps and homestays are available, making it easy to stay overnight before or after the trek.
Overall, Chopta Tungnath is a great option for families who want to enjoy the Himalayas without taking on a long or highly technical trek.
What’s the Minimum Age?
There is no fixed official minimum age for the Chopta Tungnath Trek. However, children around 6–7 years and above can consider the trek if they are healthy, active and comfortable walking uphill.
Things Parents should consider before planning the trek with children:
Can the child walk for 2–3 hours?
Can they walk continuously on an uphill trail?
Can they handle the cold weather?
Can they follow basic safety instructions?
Do they have any health problems that may make trekking difficult?
For very young children, carrying them for the entire trek can be difficult. It is better if the child can walk on their own for most of the trail.
What About Senior Citizens?
There is also no fixed age limit for senior citizens. A fit and active senior who regularly walks may be able to complete the Tungnath Trek comfortably.
If you are not used to uphill walking, take your time, walk slowly and take regular breaks.
If travelling with young children or elderly family members, it is a good idea to speak with a doctor beforehand, especially if they have any existing health concerns.
Trek Distance & Difficulty Breakdown
The Chopta Tungnath Trek starts from Chopta and goes uphill to Tungnath Temple. The distance from Chopta to Tungnath is about 3.5 km one way, so the return journey is around 7 km.
If you continue from Tungnath to Chandrashila Summit, you need to walk another 1.5 km one way. This makes the total Chopta–Tungnath–Chandrashila–Chopta route about 10 km.
For families, it is important to remember that distance is not the only thing that matters. The trail goes uphill continuously, and the final climb to Chandrashila is steeper. You may find Tungnath comfortable but Chandrashila more tiring.
Route
Approx. Distance
Difficulty
Chopta → Tungnath
3.5 km one way
Easy to Moderate
Tungnath → Chandrashila
1.5 km one way
Moderate to Difficult
Chopta → Tungnath → Chopta
7 km round trip
Moderate
Chopta → Chandrashila → Chopta
10 km round trip
Moderate to Difficult
For beginners and families, allow extra time rather than trying to match the pace of experienced trekkers.
Chopta to Tungnath — Easy Stretch (3.5 km)
The Chopta to Tungnath section is the easiest part of the chopta tungnath trek. The trail is well-defined and mostly stone-paved, with a steady uphill climb through forest and open mountain areas.
Most fit adults can complete this section in around 2–3 hours. However, families should not treat this like we have to do this in 2-3 hours. Children may take longer because they need more breaks, while senior citizens may prefer to walk at a slower pace.
For families, the best approach is to walk slowly and maintain a steady pace. Avoid asking children to walk too fast or run ahead. A comfortable pace with regular breaks is much easier.
A simple strategy is:
Walk for 30–40 minutes → Take a short break → Drink water → Continue.
Do not wait until a child is completely tired before taking a break.
Once you reach Tungnath, you can rest, visit the temple when it is open, have something light to eat and decide whether everyone has enough energy to continue to Chandrashila.
If anyone feels very breathless, dizzy, nauseous or unwell, do not continue to Chandrashila just because it is only another 1.5 km. Safety should always come first.
Tungnath to Chandrashila — The Tougher Optional Extension (1.5 km)
The final 1.5 km from Tungnath to Chandrashila is steeper and more difficult. The higher altitude can also make the climb more tiring.
For families, Chandrashila should be treated as optional, especially with young children or senior citizens. If everyone feels fit and the weather is good, you can continue. Otherwise, Tungnath is a perfectly good place to stop.
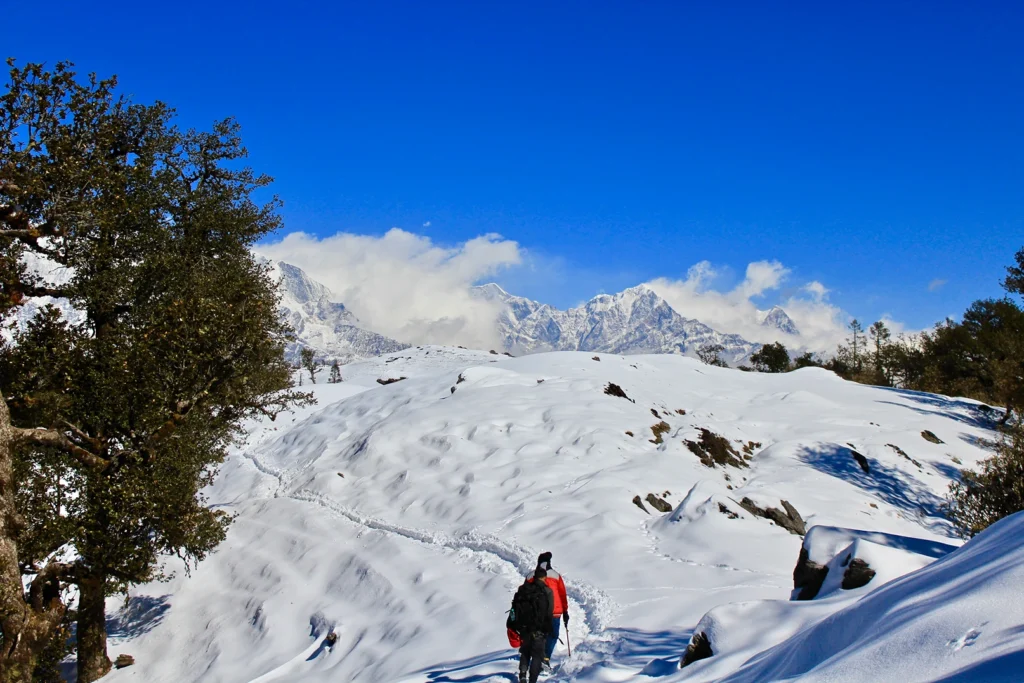
In winter, snow and ice can make the trail more difficult and slippery, so extra care is needed.
Safety is more important than reaching the summit.
Deoriatal
You can also visit Deoriatal before or after the Chopta Tungnath Trek, depending on your travel schedule. It is Located near Sari Village, a peaceful mountain lake surrounded by forests and beautiful Himalayan views.
The short trek to the Deoriatal lake is easier than the Tungnath–Chandrashila Trek, making it a good option for families and children. On a clear day, you can enjoy beautiful views of the Chaukhamba range reflected in the lake.
Deoriatal is a great place to relax, enjoy nature and spend some quiet time in the mountains. If you are travelling with children, it can also be a fun and easy way to experience a Himalayan trail without a long or difficult climb.
Winter Snow challenges
Winter completely changes your Chopta Tungnath Trek experience. The trail can be covered in snow, and ice can make the stone path slippery and more difficult to walk on.
For families, the snowy landscape can be exciting and beautiful, but the trek also becomes colder and more challenging. Cold winds, shorter daylight hours and changing weather mean you need proper winter clothing and gear.
Heavy snowfall can also affect the road to Chopta, so always check the latest road and trail conditions before travelling.
If you are planning a winter trek, carry warm layers, waterproof trekking shoes, woollen socks, gloves, a warm cap, sunglasses, sunscreen, trekking poles and a headlamp.
Winter makes Chopta Tungnath more beautiful, but it also requires extra preparation and care.
Chopta Tungnath Chandrashila Trek Itinerary
A 3-day Chopta Tungnath Trek Itinerary gives you enough time to travel, trek and enjoy the mountains without rushing.
Day 1: Delhi/Rishikesh to Chopta
Your Chopta Tungnath trek begins with a scenic drive to Chopta. If you are starting from Delhi, the journey is around 400–420 km and usually takes 10–12 hours, depending on traffic, road conditions and breaks.
If you are starting from Rishikesh, the drive is around 200 km and takes about 7–8 hours.
Once you reach Chopta, check in to your stay, relax and enjoy the mountain surroundings. Have an early dinner and get a good night’s sleep before your trek the next morning.
Day 2: Chopta to Tungnath & Chandrashila
After an early breakfast, start your trek from Chopta to Tungnath Temple. The trail is around 3.5 km one way and usually takes 2–3 hours, depending on your pace and breaks.
Walk comfortably and take short breaks whenever needed. If you are trekking with children or senior citizens, do not rush them. Take your time and enjoy the beautiful mountain views along the trail.
After reaching Tungnath, rest for a while before deciding whether to continue to Chandrashila Summit. The summit is another 1.5 km uphill and usually takes around 45–60 minutes. The trail is steeper, so continue only if everyone feels fit and the weather is good.
After spending some time at Chandrashila, start your descent back to Chopta. Walk carefully, especially on the downhill section, as it can be tiring on your knees.
The complete Chopta–Tungnath–Chandrashila–Chopta route is around 10 km and may take 5–7 hours with breaks.
Day 3: Deoriatal & Return Journey
After breakfast, drive from Chopta to Sari Village and visit Deoriatal if you have enough time and energy. The trek from Sari to Deoriatal is around 2.5 km one way and usually takes about 1–1.5 hours.
Spend some peaceful time around the lake, enjoy the Chaukhamba views and then return to Sari before starting your journey back home.
If you are tired after the previous day’s trek, you can skip Deoriatal and start your return journey directly from Chopta.
Fitness Requirements for Kids and elders
You do not need professional trekking fitness for the Tungnath Trek, but having basic walking fitness can make the trek much easier.
For adults, start preparing around 3–4 weeks before the trip. Regular brisk walking, climbing stairs and simple leg-strength exercises can help.
A practical routine can include:
30–45 minutes of brisk walking, 4–5 days a week
Stair climbing 2–3 times a week
Squats and step-ups
Light stretching
Walking with a small daypack
For children, preparation should be simple and age-appropriate. There is no need for an intense workout plan. Instead, encourage regular walking and take them on longer weekend walks.
Senior citizens should focus on walking endurance and leg strength. If someone regularly experiences breathlessness, chest discomfort, dizziness or difficulty walking uphill, it is better to take medical advice before the trip.
During the trek, keep an eye on unusual symptoms. Headache, nausea, dizziness, unusual tiredness or breathlessness can be signs of altitude-related problems. Do not encourage anyone to continue just because the destination is nearby.
A family trek is about reaching together, not about seeing who can walk the fastest.
Pony & Palanquin Options
Pony and palanquin services may be available locally for people who find the trek difficult to walk. Availability, prices and operating conditions can change depending on the season, weather and trail conditions.
For families travelling with young children or elderly members, these options can be useful as a backup.
If you plan to use a pony or palanquin:
Check availability before starting the trek.
Confirm the price beforehand.
Ask where the service is available.
Do not depend on it as your only option.
Follow local safety instructions.
Keep in mind that snow, steep sections, crowds or difficult trail conditions can affect these services.
For children, a pony ride may also feel uncomfortable or scary on steep sections. It is better to keep pony or palanquin services as a backup option rather than planning your entire trek around them.
Best Time to visit Chopta Tungnath with Family
The best time to visit Chopta Tungnath with your family depends on the experience you want.
For comfortable trekking, April to June and September to November are generally good months. The weather is pleasant, the trail is easier to walk and you can enjoy clear mountain views.
If you want to experience snow, winter can be a beautiful time to visit. However, snow and ice can make the trail more difficult and slippery, so proper winter clothing and extra care are important.
April to June —
April to June is a beautiful time to visit Chopta Tungnath with your family. As winter fades, rhododendron flowers start blooming, and the surrounding hills and meadows slowly turn green.
Early in the season, you may still find some snow on the higher sections, while the later months offer more comfortable conditions for trekking.
Note: May and June are popular months, so expect some crowds around Chopta and Tungnath.
July to August — Monsoon Considerations
July and August are generally not recommended for families with kids and elders. Heavy rain can make the roads and trekking trail wet and slippery, while landslides may cause delays on the way to Chopta. It is better to avoid chopta tungnath trek during the monsoon.
September to November
September and October are excellent months for families planning the Chopta Tungnath Trek. The monsoon usually starts to withdraw, mountain views become clearer, and the landscape remains green and fresh. October can bring colder mornings and evenings, so warm layers are important.
By November, temperatures drop further and winter conditions may begin at higher elevations. If you are planning a late-season visit, always check the Tungnath Temple’s seasonal opening status before travelling.
December to February
December to February is the best period for families who specifically want to experience snow in Chopta. The scenery can be beautiful, but winter also makes the trek more challenging. Snow and ice can make sections of the trail slippery, temperatures can fall below freezing, and road conditions may be affected by snowfall.
This season is not the easiest choice for toddlers, elderly travellers, or families doing their first Himalayan trek. If your priority is a comfortable family pilgrimage with easier walking conditions, it is better to choose a milder season.
How to Reach Chopta from Delhi/Rishikesh
Chopta is connected by road, so you can reach it by private taxi, shared vehicle, public transport. The best option depends on your budget and how much comfort you want.
From Rishikesh to Chopta
From Rishikesh, the journey to Chopta usually takes around 8–10 hours, depending on traffic, weather, road conditions and stops. The common route passes through Devprayag, Srinagar, Rudraprayag and Ukhimath before reaching Chopta.
If you want to travel by public transport, you can take a bus or shared vehicle from Rishikesh towards Ukhimath. From Ukhimath, you can take a shared taxi or local vehicle towards Chopta. This is generally the cheapest way to reach Chopta, but you may need to change vehicles and the journey can take longer.
For families with children or senior citizens, a private taxi can be more comfortable because you can take breaks and travel at your own pace.
From Delhi to Chopta
The journey from Delhi to Chopta is much longer, so it is better to travel to Rishikesh first and continue to Chopta from there.
If you are travelling with children or senior citizens, consider taking a break at Rishikesh or another suitable place instead of completing the entire journey in one stretch.
Public Transport Cost
Public transport is usually the cheapest way to reach Chopta. From Rishikesh, you can take a bus or shared vehicle towards Ukhimath and then take a shared taxi to Chopta.
The total cost from Rishikesh to Chopta by public transport may be around ₹500–₹800 per person, depending on the bus and shared taxi you take. You may also need to change vehicles at Ukhimath.
Taxi and Cab to Chopta
If you want a more comfortable and direct journey, you can book a private taxi or cab from Rishikesh to Chopta. The approximate cost is usually around ₹6,000–₹8,000 for a small car for one way, depending on the vehicle, season and taxi operator.
You can also contact a local service such as Chamoli Taxi Service for current taxi rates and availability.
A private taxi can be a better option when travelling with children or senior citizens, as you can stop for food, rest and sightseeing along the way.
Transport with Roopkund Heaven
If you are booking the Chopta Tungnath Trek package with Roopkund Heaven, you can add transport as an optional add-on while booking your trek.
Our standard transport add-on is ₹1,600 per person. The usual pickup point is Tapovan, Rishikesh.
Once your booking is confirmed, we will share the vehicle and driver details with you before the journey.
If Tapovan is not convenient for you, you can also request a different pickup or drop-off point. We can customize the transport based on your convenience, subject to an additional cost.
Packing checklist with Family
When travelling with family, pack for comfort, warmth and safety. You do not need to carry too many things.
Essential Things to Pack
For each family member, carry:
Comfortable trekking shoes with good grip
Warm clothes and extra layers
Thermal innerwear during colder months
Fleece or light jacket
Waterproof jacket or rain cover
Woollen cap
Gloves
Extra pairs of socks
Sunglasses
Sunscreen
Personal medicines
Small first-aid kit
Reusable water bottle
ORS or electrolytes
Energy snacks
Tissues and toilet paper
Hand sanitiser
Power bank
Headlamp or torch
Small backpack
What to Pack for Children
Children can get cold or tired more quickly, so carry one extra warm layer and an extra pair of socks for them. Keep their clothes dry and easily accessible.
Do not give children a heavy backpack. Parents can carry the common family items, while older children can carry only a small and light personal bag.
If There Is Snow
If you are visiting when there is snow on the trail, carry suitable warm and waterproof footwear. Gaiters can also be useful for keeping snow and water out of your shoes.
Avoid Brand-New Trekking Shoes
One of the most important things to remember is not to wear new trekking shoes for the first time on the trek. Wear them a few times before the trip so your feet can get used to them.
New shoes can cause blisters and foot pain, which can make the trek difficult, especially for children and older family members.
The goal is simple: pack light, stay warm and carry only what you really need.
Best family-friendly Stays in Chopta
For a family trip to Chopta, choose your stay based on cleanliness, comfort, location, food and basic facilities rather than only looking at photos. Accommodation in Chopta is more basic than in cities, but you can find hotels, resorts, camps, guesthouses and homestays.
Some stays and resorts you can consider in and around Chopta include Himrab Chopta Resort, Chopta Resort, Chopta Eco Resort, Hotel Snow View Chopta, Himalaya Resort Chopta, and Amar Resort. There are also several camps and homestays around Duggalbitta, Baniyakund and other areas near Chopta. Availability and facilities can vary by season.
For families with young children or senior citizens, try to choose a property that is convenient for your travel plans and does not require unnecessary walking before the trek. Staying close to the main road and having easy vehicle access can make the trip more comfortable.
What to Check Before Booking
Before booking your stay, ask about:
Attached or shared bathroom
Hot water availability
Room heating arrangements
Family rooms or extra beds
Distance from the Tungnath trek starting point
Parking availability
Food and meal options
Electricity and power backup
Mobile network and Wi-Fi
Extra charges for children or additional guests
If you are travelling during the colder months, ask specifically about room heating and hot water before confirming your booking.
A comfortable stay is important because you need to be well-rested before starting the Tungnath Trek. For families, it is better to reach Chopta, settle into your accommodation and get enough rest rather than starting the trek after a tiring journey.
Practical Tips
Chopta is a mountain destination, so facilities are more basic than in cities. A little preparation can make the trek easier, especially with children and senior citizens.
Network: Mobile network can be weak or unavailable in some areas. Download offline maps and save important phone numbers before starting.
Charging: Charging facilities may be limited. Carry a fully charged power bank and use your phone’s battery-saving mode.
Toilets: Toilets are limited along the trail. Use the toilet before starting and carry tissues, wet wipes and hand sanitiser.
Food: Carry snacks that children like, such as biscuits, bananas, dry fruits, chocolate and energy bars. Do not depend completely on food being available on the trail.
Water: Carry enough water and encourage children to take small, regular sips during the climb. ORS or electrolytes can also be useful.
Weather: Mountain weather can change quickly. Carry a light rain jacket and an extra warm layer, even if the morning is clear.
Clothing: Keep an extra pair of socks for children. Wet clothes or socks can make them uncomfortable quickly.
Medicines: Carry personal medicines and a small first-aid kit with basic items such as bandages and blister protection.
Sun protection: Carry sunglasses, sunscreen and a cap. The mountain sun can be strong even when the weather feels cold.
Children: Keep children close to the group, especially near steep, slippery or crowded sections. Do not let them walk alone.
Backpack: Avoid giving children a heavy bag. Parents can carry the shared family items.
Start early: Starting early gives you more daylight and allows you to walk at a relaxed pace.
Keep extra time: Mountain roads and weather can cause delays, so avoid making a very tight schedule.
Most importantly, do not rush the trek. Walk slowly, take regular breaks and plan according to how everyone in the group is feeling.
How to Book the Chopta Tungnath Family Tour Package
Are you planning to visit Chopta and Tungnath with your family? Roopkund Heaven offers a family-friendly Chopta Tungnath Trek Package designed to make your mountain trip simple, comfortable and enjoyable.
Our Chopta Tungnath package starts from ₹6,900 per person and includes accommodation, meals, trek support, permits and other essential arrangements.
Chopta Tungnath Package – ₹6,900 Per Person
Offer Price: ₹6,900 per person + 5% GST
The package includes:
Stay: Accommodation is included from Chopta to Chopta. You will stay in comfortable Swiss camps on a sharing basis.
Meals: All meals from Day 1 dinner at Chopta to Day 3 breakfast are included. We provide simple, nutritious and vegetarian meals.
Permits & Forest Fees: Required forest entry fees, permits, toll taxes and fuel charges are included.
Trek Support: A professionally trained cook and experienced support staff will be with you during the trek.
Trek Arrangements: Our team takes care of the essential trek logistics so you can focus on enjoying the journey.
FAQs
1. Is the Chopta Tungnath Trek safe for kids?
Yes, older and healthy children can do the Tungnath Trek when the weather and trail conditions are suitable. Walk slowly, take regular breaks and keep children close to you.
2. What is the minimum age for the Tungnath Trek?
There is no fixed official age limit for the trek. Children around 6–7 years and above may be able to do it if they are healthy, active and comfortable walking uphill.
3. How difficult is the Tungnath Trek for beginners?
The Chopta to Tungnath trek is easy to moderate for reasonably fit people. It is about 3.5–4 km one way, but the continuous uphill climb can be tiring for children and older travellers.
4. Can senior citizens do the Tungnath Trek?
Yes, fit and active senior citizens can do the trek. Walking regularly before the trip can help. Take your time, rest when needed and use local assistance if required.
5. Can we do Tungnath without going to Chandrashila?
Yes. Chandrashila is optional. You can visit Tungnath Temple and return to Chopta. This is a good option if children or senior travellers feel tired.
6. Is Chandrashila suitable for kids?
Chandrashila is more difficult than Tungnath because the final section is steeper. With young children, it is better to decide at Tungnath based on their energy, comfort and weather conditions.
7. Are ponies and palanquins available for Tungnath?
Pony and palanquin services may be available, depending on the season and local conditions. Availability and charges can change, so confirm before starting the trek.
8. What is the total distance of the Chopta Tungnath Trek?
The trek from Chopta to Tungnath is around 3.5–4 km one way, making it about 7–8 km round trip. Going further to Chandrashila adds around 3 km to the round trip.
9. What should kids carry for the Tungnath Trek?
Children should carry only a small water bottle, light snacks, sunglasses and a warm layer. Parents should carry medicines, rain protection, extra clothes and other shared items. Avoid giving children heavy backpacks.
10. What is the best time for a Chopta Tungnath trip with kids and family?
April to June and September to October are generally good months for the trip. Weather can change quickly in the mountains, so always check the latest weather and trail conditions before travelling.
11. How much does the Chopta Tungnath family package cost?
The Roopkund Heaven’s Chopta Tungnath package starts from ₹6,900 per person, plus 5% GST. The package includes accommodation, meals, permits and trek support. Transport can be added from your city at an additional cost.
Ali Bedni Bugyal Trek with Kids and Family — Complete Guide
Are you looking for a family-friendly trek where you can enjoy a multi-day Himalayan trek with your kids and grandparents? If everyone in your group is healthy, active and comfortable with long walks, the Ali Bedni Bugyal Trek can be a great choice.
The trek offers beautiful meadows, mountain views and a peaceful trail without requiring technical climbing. However, it is still a moderate trek with uphill walking and high-altitude sections, so proper preparation is important, especially when travelling with children or older members.
In this guide, we explain the trek from a practical point of view, including difficulty, age suitability, fitness, acclimatisation, best season, travel, packing, safety and how Roopkund Heaven can help you plan the journey.
Why Ali Bedni Bugyal Is India’s Most Loved Family Trek
The Ali Bedni Bugyal Trek is a great choice for families looking for their first Himalayan trekking experience. It offers a good balance of manageable walking, beautiful alpine meadows, mountain views and village life, without requiring technical climbing skills. The trek starts from Lohajung in Chamoli, Uttarakhand, and passes through forests and mountain villages before reaching the vast Ali Bugyal and Bedni Bugyal meadows.
The trek is usually covered in a 6-day itinerary, with around 6–10 km of walking per day, depending on the route and campsite. This can be manageable for active children and beginners who are comfortable walking for a few hours. However, it is important to have realistic expectations. Being a family-friendly trek does not mean the trek will feel easy for everyone. A child who is not used to long walks may find the uphill sections tiring, while an active child who enjoys walking, hiking or outdoor activities may manage the trail more comfortably.
The trek also reaches a high altitude, so altitude sickness (AMS) is possible. A steady pace, proper hydration, sufficient rest and gradual acclimatisation are important, especially for children. Parents should also consider the long road journey to Lohajung when planning the trip.
One of the biggest highlights is the open meadow landscape. Children can enjoy the wide grasslands and natural surroundings while trekkers can admire clear views of Trishul, Nanda Ghunti and other Himalayan peaks. The route also passes through forests, traditional villages and grazing areas, giving children a chance to experience Himalayan mountain life.
The open meadow campsites can make the experience enjoyable, although exact camping locations depend on the itinerary and current local regulations. Some local support is available along parts of the route, but this remains a remote mountain trek, so proper preparation and supervision are essential.
Overall, Ali Bedni Bugyal Trek offers a genuine Himalayan adventure without the technical challenges of tougher treks. With reasonable fitness, proper preparation and a comfortable pace, it can be an excellent introduction to trekking for parents and children.
What Actually Makes This Trek Safe and Easy for Families
The Ali Bedni Bugyal Trek can be a good choice for families with kids and senior citizens. The trek does not need technical climbing. However, it is still a mountain trek. Good preparation is important.
How Difficult Is the Trek?
The Ali Bedni Bugyal Trek is generally easy to moderate. But it can feel different for each person.
There is no technical climbing on the usual route. You do not need ropes or climbing equipment. However, there are uphill paths, uneven ground, forest trails and open meadows.
The first uphill section can be tiring. This is especially true for children who are new to mountain walking.
The trail becomes easier after reaching the meadows. There are more open and gentle sections.
A child may walk 5 km easily on a flat road. The same 5 km can feel much harder on a mountain trail.
So, fitness and walking ability are more important than age alone.
How Does the Body Adjust to the Height?
Ali Bedni Bugyal reaches around 3,500 metres and above. At this height, the body needs time to adjust.
The trek gains height over several days. You do not reach the highest point in one day. This gives the body more time to adjust.
Children may not always say when they feel unwell. Parents should watch them closely.
Look for signs such as:
Headache
Dizziness
Nausea or vomiting
Unusual tiredness
Being unusually quiet
Being unusually irritated
Feeling very cold
If a child feels unwell, tell the trek leader immediately. Do not assume it is just normal tiredness.
Simple Things That Make the Trek Easier
A few simple things can make the trek more comfortable:
Keep the child’s backpack very light.
Walk at a slow pace.
Take breaks when needed.
Keep water and snacks easy to reach.
Carry an extra warm layer.
Start walking early.
Do not rush.
Keep children close to adults on uneven paths.
Give everyone enough time to rest at the campsite.
Weather can also affect the difficulty of the trek.
Monsoon and early September: Trails can be muddy and slippery because of rain.
Winter: Temperatures are much lower, and cold winds can make the higher areas feel even colder.
The most important thing is to plan the trek according to the youngest and least experienced person in the group. With the right pace, preparation and supervision, the trek can be challenging without becoming unnecessarily difficult.
How Old Should Your Child Be? A Realistic Age Guide
There is no fixed age requirement for the Ali Bedni Bugyal Trek with Kids. Every child is different, and their fitness, confidence, stamina and previous outdoor experience can vary even at the same age.
As a practical guideline, we recommend considering children around 8–10 years and above, provided they are healthy, active and comfortable with long walks and uphill sections.
Younger children may also be able to complete the trek in some cases, but parents should consider the child’s individual ability rather than relying only on age.
Before planning the trek, consider:
Can your child walk for several hours without getting overly tired?
Are they comfortable walking uphill?
Have they done long walks or short hikes before?
Can they follow instructions on the trail?
Can they clearly tell an adult if they feel tired or unwell?
Are they comfortable staying away from home for several days?
Can they handle cold weather and changing mountain conditions?
These factors are often more useful than simply looking at the child’s age. A child who is active, enjoys walking and spends time outdoors may adjust better to the trek than an older child who is not used to physical activity.
Parents should also consider the long road journey, as the overall experience includes several hours of travel before and after the trek.
For younger children, trying a few shorter hikes first can help parents understand how they handle walking, uphill sections, tiredness, weather and unfamiliar surroundings.
There is also no need to push a child to match the pace of other children in the group. Every child has a different level of stamina and comfort.
The right approach is to choose the trek when your child is physically ready, mentally comfortable and able to communicate clearly if they need help or are not feeling well.
Health Checks Every Family Should Do Before This Trek
Before booking an Ali Bedni Bugyal family trek, consider the health and fitness of everyone travelling with you.
The trek reaches high altitude, where medical facilities are more limited than in cities. It is therefore better to identify any health concerns before starting the journey rather than dealing with them after reaching the mountains.
A child who is active and regularly participates in outdoor activities may have a good fitness foundation for trekking. However, being fit does not completely prevent altitude-related problems, so everyone should still be monitored during the trek.
Before the trek, consider:
General fitness and stamina
Previous experience at high altitude
Any breathing difficulties
Existing heart or lung conditions
Severe allergies
Motion sickness during long road journeys
Current medications
Any recent illness or infection
If anyone has a significant or ongoing medical condition, it is best to consult a qualified doctor before the trek. Do not stop, change or skip prescribed medication without medical advice.
Fitness Preparation
Start preparing around 3–4 weeks before the trek. The goal is not to build extreme strength but to make several hours of walking feel comfortable.
For adults, preparation can include:
Brisk walking for 30–45 minutes
Stair climbing
Incline walking
Cycling
Light squats and lunges
Longer walks on weekends
For children, regular walking, cycling, swimming, outdoor games and other active activities can provide useful preparation. Keep the training enjoyable rather than treating it like intense exercise.
Parents should also break in the child’s trekking shoes before the journey. New or uncomfortable shoes can cause blisters and foot pain during long walking days.
Carry personal medicines, basic first-aid supplies, blister protection, sunscreen, lip balm and any other essentials required by each traveller.
Most importantly, tell the trek leader about any health concern before starting. Early information helps the team respond better if the traveller develops a problem during the trek.
When to Go: The Best Season for a Family Trek to Ali Bedni Bugyal
The best time for the Ali Bedni Bugyal Trek with Family depends on the type of experience you want.
For most travellers, May to June and September to October are among the better periods for the trek.
May to June
Late spring and early summer bring fresh greenery, blooming flowers and colourful landscapes to Ali and Bedni Bugyal. The meadows begin to look vibrant, while daytime temperatures are generally comfortable for trekking.
Higher sections can still remain cold, especially during the early mornings and nights, so warm layers are important even when afternoons feel pleasant.
This period is a good choice for people who want to see the meadows in their greener form.
July to August
We generally do not recommend the monsoon period for a first trek with children.
Rain can make forest trails muddy and slippery, while the approach roads to Lohajung may be affected by heavy rainfall, landslides and travel delays. Cloud cover can also reduce visibility and limit mountain views.
If travelling during these months, always check the latest weather and road conditions before starting your journey.
September to October
September and October are also great months for the Ali Bedni Bugyal Trek. September usually has green meadows and pleasant weather, while October brings clearer skies and better mountain views. Nights start getting colder, especially in October.
If you want clear Himalayan views and comfortable trekking conditions, September and October are good choices.
Winter
Winter offers a completely different experience. Snow can cover the trails and meadows, temperatures can drop a lot, and trekking becomes more difficult.
For a first family trek in Uttarakhand, we would generally prefer the more comfortable trekking seasons rather than choosing winter conditions.
Before planning your trek, always check the latest weather, trail and trek conditions.
Getting to the Trailhead: Travel Time, Routes & Family Logistics
The Ali Bedni Bugyal Trek usually starts from Lohajung Village, located in Chamoli district of Uttarakhand.
Reaching Lohajung involves a long mountain drive. From Rishikesh to Lohajung, the journey usually takes around 9–11 hours, depending on traffic, road conditions, weather and stops.
Long mountain journeys can be tiring, especially for younger children. Keep these items handy during the drive:
Water
Light snacks
Motion-sickness medicine, if normally used or prescribed
Warm clothes
Personal medicines
Wet wipes and tissues
Small entertainment items
Keep these things in a small day bag instead of your main luggage so they are easy to reach during the journey.
Roopkund Heaven Pickup Points in Rishikesh
When you book an Ali Bedni Bugyal Trek package with Roopkund Heaven, we share the travel date, pickup details and other important information after your booking is confirmed.
Our usual pickup points in Rishikesh are:
Tapovan
Natraj Chowk
If you need a customised transport arrangement, you can request it according to your convenience. Additional charges may apply depending on the transport option and pickup location.
What to Pack: A Family Gear Checklist That Actually Helps
The right Ali Bedni Bugyal trek packing list for kids should focus on comfort rather than carrying everything you own.
The biggest mistake parents make is giving children heavy backpacks.
Children should carry only a few personal items. Adults or the support team should carry shared equipment and heavier belongings.
Clothing
Use layers so clothing can be added or removed according to the weather.
Pack:
Thermal innerwear.
Full-sleeve T-shirts.
Fleece jacket.
Warm insulated jacket.
Trekking pants.
Woollen cap.
Gloves.
Warm socks.
Extra socks.
Rain jacket or poncho.
The extra socks are particularly useful if feet become wet.
Trekking Shoes
Good footwear is one of the most important items.
Choose shoes with:
Good grip.
Comfortable fit.
Proper ankle support.
Enough space for trekking socks.
Do not use brand-new shoes on the trek. Let the child wear them during practice walks first.
What Should Children Carry?
A child’s backpack can contain:
Water bottle.
Small snack.
Sunglasses.
Cap.
Light rain layer.
Do not give children a heavy bag containing extra clothes, medicines, power banks and family supplies.
Personal and Safety Items
Parents should carry:
Personal medicines.
Basic first-aid kit.
Blister patches.
Sunscreen.
Lip balm.
Hand sanitiser.
Tissues.
Wet wipes.
Power bank.
Headlamp or torch.
Ali Bedni Bugyal Trek Gear Checklist
Essential: trekking shoes, warm layers, rain protection, water bottle, sunglasses, sunscreen, personal medicines and headlamp.
Useful: trekking poles, dry bags, extra plastic bags for wet clothes and a power bank.
Avoid: heavy suitcases, unnecessary gadgets and oversized backpacks.
The goal of packing is simple: keep everyone warm, dry, comfortable and able to walk easily.
How to Keep Kids Happy, Engaged & Safe on the Trail
A child can be physically capable of doing a trek and still become unhappy after several hours of walking.
This is normal.
Children may get bored, ask how much longer they have to walk, or suddenly say they do not want to continue. Parents can make the journey easier by breaking the trek into small goals.
Instead of saying, “We still have four hours,” give them smaller targets:
This helps children feel that they are making progress.
You can also keep them interested in the surroundings. Ask them to notice different trees, birds, streams, mountain shapes or village houses along the way.
Do not make the entire trek about walking fast or reaching the campsite quickly.
Safety on the Trail
Children should stay close to adults, especially on narrow, wet or uneven sections of the trail.
Teach them these three simple rules before starting:
Do not walk far ahead of the group.
Do not run downhill.
Tell an adult immediately if you feel dizzy, sick, very tired or unusually cold.
Keep snacks easily available. Small portions during breaks can help maintain energy.
At higher camps, children can get cold quickly after sunset. Put on warm layers before they start shivering, rather than waiting until they are already cold.
Also watch their behaviour.
If a child becomes unusually quiet, develops a persistent headache, vomits, feels dizzy or behaves differently, tell the trek leader immediately.
Do not compare children with other trekkers. One child may walk quickly while another needs more breaks.
The goal is not to finish first.
The goal is for everyone to complete the trek comfortably, safely and with a positive experience of the mountains.
Why Families Trust Roopkund Heaven for This Trek
At Roopkund Heaven, we focus on making the Ali Bedni Bugyal Trek well-planned and easy to understand. We provide clear information about the route, difficulty, weather, travel arrangements and what to carry, so you know what to expect before the trek.
Depending on your package, we can arrange accommodation, meals, trek support, permits and transportation. During the peak season, you can join our regular batches on your preferred date, or choose a private trek for your family or group of friends.
Our goal is simple: clear information, proper planning and reliable trek support.
Offer Price
₹8,500 + 5% GST
Inclusions
Accommodation: 2 nights in a guesthouse at Lohajung on triple/quad sharing and 3 nights in tents during the trek on triple sharing.
Meals: Vegetarian meals from Day 1 dinner to Day 6 morning tea.
Tea, Snacks & Soup: Morning and evening tea/coffee, light snacks and soup during the trek.
Trek Leader: Certified and experienced trek leader throughout the trek.
Guide & Support Team: Experienced guide and support staff.
Medical Support: Basic first-aid kit, oximeter and oxygen cylinder.
Transportation: Non-AC Sumo, Bolero or Tempo Traveller, depending on the group size.
Permits: Required permits and fees for Indian nationals.
Cloak Room: Storage facility at the base camp for extra luggage.
Booking Options
Custom Transport: Pickup and drop can be arranged from a location convenient for you at an additional cost.
Regular Batches: During the peak season, regular batches are available on multiple dates. Choose a date that suits your travel plan.
Private Trek: Private tours are available for families, groups of friends and other private groups who want to trek together on their preferred dates.
Contact Roopkund Heaven with your preferred travel date and group details to check availability and package options.
Questions Every Parent Asks About Ali Bedni Bugyal
1. Is Ali Bedni Bugyal safe for kids?
Yes, healthy and active children can do the trek with proper preparation and adult supervision. It is a moderate trek, so children should be comfortable walking for several hours.
2. What is the best age for Ali Bedni Bugyal Trek?
There is no fixed age for every child. As a practical guideline, 8–10 years and above may be suitable for healthy and active children.
3. Is Ali Bedni Bugyal suitable for beginners?
Yes. Beginners can do this trek with reasonable fitness. No technical climbing skills are required, but regular walking and stair practice are recommended.
4. How difficult is Ali Bedni Bugyal for families?
The trek is generally moderate. Expect uphill walking, uneven trails, cold weather and several hours of walking each day.
5. What is the highest altitude of Ali Bedni Bugyal?
Ali Bedni Bugyal reaches around 3,500 metres and above, depending on the route and highest point covered in your itinerary.
6. Can senior citizens do the Ali Bedni Bugyal Trek?
Fit and active senior citizens may be able to do the trek. Fitness and walking ability are more important than age. Consult a doctor if there are existing health concerns.
7. What is the best time for Ali Bedni Bugyal Trek?
The best periods are generally May to June and September to October. These months usually offer better trekking conditions and good mountain views.
8. Is Ali Bedni Bugyal safe during monsoon?
July and August are generally less suitable because heavy rain can make trails slippery and may cause road disruptions. Check the latest weather and road conditions before travelling.
9. What should kids carry for the trek?
Children should carry only a light backpack with water, a small snack, sunglasses, a cap and a light layer. Adults should carry medicines, extra clothes and shared items.
10. How should children prepare for the trek?
Start preparing 3–4 weeks before the trek with regular walking, stair climbing, cycling or outdoor activities. Longer practice walks are especially useful.
11. Why choose Roopkund Heaven for an Ali Bedni Bugyal trek?
Roopkund Heaven can help arrange accommodation, meals, trek support, permits and transport, depending on the package. Share your travel dates, group size and children’s ages with our team to discuss the trek and available options.
Rudranath Temple Kapat Closing Date 2026: Everything You Need to Know
The Rudranath Temple kapat (doors) closing date is scheduled for 17 October 2026. The temple will close for the winter season after the traditional closing ceremony.
If you are planning to visit Rudranath in October, it is important to plan your trek before the temple closes. Rudranath is a remote high-altitude temple, so you should not plan your trek for the last few days without checking the latest weather and route conditions.
In this guide, you will know about the closing ceremony, the winter seat of Rudranath ji, how to plan your visit before kapat closing, the trekking route, travel planning, safety tips, and the best time to visit Rudranath temple.
About Rudranath Temple
Rudranath Temple is one of the five Panch Kedar temples of Uttarakhand and is traditionally known as the Fourth Kedar. According to Hindu tradition, the naturally formed stone worshipped at Rudranath represents the face of Lord Shiva.
The temple is located in the Chamoli district of Uttarakhand, in the high Garhwal Himalayas at an altitude of around 11,800 ft (3,600 m). There is no direct road to the temple, so you have to complete the journey on foot. Rudranath trek starts from Sagar Village, near Gopeshwar. From Sagar Village, the trek is approximately 20–22 km one way, depending on the exact trail and route conditions.
The route passes through Pung Bugyal, Panar Bugyal, Pitradhar and Lwiti Bugyal before reaching Rudranath Temple. You will walk through forests, alpine meadows, rocky sections and high-altitude terrain.
Starting Point: Sagar Village
Rudranath Temple Altitude: Approx. 11,800 ft (3,600 m)
Trek Distance: Approx. 20–22 km one way
Total Trek: Around 40–44 km for the return journey
Difficulty: Difficult
Terrain: Forests, meadows, rocky and uneven trails
The trek is considered Difficult, especially for beginners. The main challenge is the long distance and walking at high altitude. During the trek, you may have to deal with:
Long uphill and downhill sections
High-altitude trails
Changing weather
Steep and uneven paths
Cold nights
Limited accommodation
Limited medical facilities
Long stretches without road access
Because of these challenges, Rudranath Trek requires good fitness and preparation.
The reward is the Himalayan setting. On clear days, you can enjoy beautiful views of Nanda Devi, Trishul, Nanda Ghunti and Hathi Parvat along the route.
If you are trekking for the first time, prepare yourself for several hours of walking each day. Good fitness, proper trekking shoes, warm clothes and enough rest will make your journey easier and more comfortable.
Rudranath Temple Kapat Closing Date 2026
The Rudranath Temple Kapats are scheduled to close for the winter season on 17 October 2026 at around 7:46 PM. The temple will close after the traditional closing rituals, marking the end of the 2026 pilgrimage season.
Rudranath Temple Dates
Details
Date
Opening Date
18 May 2026
Closing Date
17 October 2026
Closing Time
Around 7:46 PM
Winter Seat
Gopinath Temple, Gopeshwar
Location
Chamoli, Uttarakhand
On the closing day, special prayers, Maha-Aarti and traditional rituals are performed before the temple doors are closed for winter. After the ceremony, the Utsav Doli of Lord RudranathJI begins its journey towards Gopinath Temple, Gopeshwar, where Rudranath Ji is worshipped during the winter months.
Why Rudranath Temple Closes Every Winter
Rudranath Temple is located at around 11,800 ft in a remote Himalayan region. During winter, the area experiences heavy snowfall, freezing temperatures, strong winds and difficult trekking conditions.
The trail can become covered with snow and ice, while poor visibility can make navigation difficult. There is also very limited:
Food and accommodation
Medical support
Road access
Mobile communication
Emergency assistance
Because of these conditions, regular pilgrimage becomes difficult during the winter months.
If you want to visit Rudranath, plan your trek before 17 October. September and early October are generally more suitable, while late October can bring colder weather and early snowfall.
Important Note: Do not attempt the Rudranath Trek after the temple closes for winter, as regular pilgrim facilities may not be available and trail conditions can become unsafe.
Gopinath Temple: The Winter Seat of Rudranath Ji
After the Rudranath Temple closes for winter, Gopinath Temple in Gopeshwar becomes the winter seat associated with Lord Rudranath.
This arrangement is necessary because the original Rudranath shrine becomes extremely difficult to access during the winter months. Instead of expecting pilgrims to reach the high-altitude temple through snow-covered terrain, worship continues at the lower winter seat.
For pilgrims, this gives you another option after the Rudranath temple winter closure.
If your travel dates fall after October 17, you should not attempt to trek to the closed Rudranath shrine simply because you want darshan. Instead, you can visit Gopinath Temple in Gopeshwar and worship Rudranath Ji according to the winter tradition.
In spring, the Utsav Doli of Rudranath Ji begins its journey from Gopeshwar towards the original temple. The Rudranath Temple then reopens for the summer pilgrimage season.
This seasonal movement is an important part of the religious tradition of the Fourth Kedar.
Last Window to Visit Before Temple Kapat Closing
Important Tips for a Late-Season Trek
1. Keep your dates flexible Mountain weather can change quickly, so keep some extra time in your itinerary for rain or travel delays.
2. Carry warm clothing For September and October, carry thermal wear, a fleece jacket, an insulated jacket, waterproof jacket, warm socks, gloves, a woollen cap and good trekking shoes.
3. Protect your luggage Use a backpack rain cover and waterproof bags for your clothes, medicines and electronics.
4. Book accommodation early Accommodation is limited in remote areas, so it is better to book your stay in advance.
5. Start your trek early An early start gives you more daylight and enough time to complete the trek without rushing.
6. Be ready for cold weather October can be quite cold at higher altitudes, especially after sunset. Carry enough warm layers.
Most importantly, do not plan your trek for the exact temple closing date. Plan your journey a few days before 17 October 2026 so you have enough time in case of bad weather or travel delays.
How to Reach Rudranath from Rishikesh
The journey to Rudranath Temple from Rishikesh has two main parts: the road journey to Sagar Village and the trek from Sagar to Rudranath. Since there is no road directly to the temple, you need to reach the trek starting point first.
Road Journey from Rishikesh to Sagar Village
Sagar Village is the main starting point for the Rudranath Trek. It is located near Gopeshwar and is approximately 212 km from Rishikesh. The road journey generally takes around 7–9 hours, depending on traffic, road conditions, weather and seasonal delays.
By Private Taxi or Cab
You can hire a private taxi from Rishikesh to Sagar Village. A private cab is a convenient option if you are travelling with family or a small group because you can travel directly without changing vehicles.
Distance: Approximately 212 km
Travel time: 7–9 hours
Approx. fare: ₹6,000–₹8,000 for a private one-way taxi
For private transportation, you can consider Chamoli Taxi Service, especially if you want a reliable vehicle for the Rishikesh–Sagar journey and other local travel.
By Bus or Shared Jeep
For a budget-friendly option, you can take a bus or shared jeep from Rishikesh towards Gopeshwar or Chamoli. The approximate fare is around ₹500–₹800 per person, depending on the vehicle and route.
From Gopeshwar to Sagar Village, you can take a local shared jeep or taxi. Sagar Village is approximately 5 km from Gopeshwar, and the local fare is usually around ₹50–₹100 per person in a shared vehicle.
Public transport timings and fares can change depending on the season and local availability, so it is better to start early and keep some extra time for connections.
Important Tips If You Are Travelling in Your Own Vehicle
If you are planning to drive from Rishikesh to Sagar Village in your own car, keep a few things in mind:
Avoid night driving in the mountains. Start your journey early in the morning so you can reach your destination before dark.
Fill your fuel tank in advance. Petrol pumps are limited on the mountain route, and some may close before 10 PM.
Do not depend on finding a petrol pump late at night. It is better to refuel whenever you get the opportunity.
Keep some extra time in your schedule for traffic, road work, landslides or weather-related delays.
Drive carefully on mountain roads and avoid rushing, especially around sharp bends and narrow sections.
Most importantly, plan to complete the mountain drive during daylight hours.
Trek from Sagar Village to Rudranath
Once you reach Sagar Village, your road journey ends and the Rudranath Trek begins. The trek is considered difficult and takes you through dense forests, alpine meadows, rocky trails and high-altitude Himalayan terrain.
A typical trek plan is:
Day 1: Sagar Village to Lyuti/Panar Bugyal – approximately 9 km, with a steep uphill climb.
Day 2: Lyuti/Panar Bugyal to Rudranath Temple – approximately 11 km, with ridge sections, uphill and downhill stretches.
Day 3: Rudranath Temple to Sagar Village – approximately 20–22 km, mostly downhill.
The total trekking distance from Sagar to Rudranath and back is around 40–44 km.
Travelling with Roopkund Heaven
If you book the Rudranath Trek package with Roopkund Heaven, you can add transportation to your package according to your requirements.
Our main pickup point is Tapovan, Rishikesh, where our driver will pick you up and your journey will begin.
You can also customize your pickup location. If you are travelling from Delhi or another city, we can arrange transportation at an additional cost.
Once your booking is confirmed, our team will share all the important details with you, including your pickup location, reporting time, driver details and other travel information.
Looking Ahead: When Will Rudranath Temple Reopen in 2027?
The exact Rudranath Temple opening date 2027 will be announced according to the traditional Hindu calendar. For planning purposes, Rudranath Temple is likely to reopen around mid-May 2027, but the date is not confirmed yet.
If you are planning a 2027 trek, wait for the official opening date before booking your final travel plans. Also check the latest road conditions, forest registration requirements and accommodation availability.
If you are planning the complete Panch Kedar Yatra, remember that Rudranath has its own opening and closing schedule and may close earlier than some of the other temples.
Frequently Asked Questions
1. Can I visit Rudranath after the kapat is closed?
No. You should not plan a regular pilgrimage trek to Rudranath after the temple closes on 17 October 2026. During winter, heavy snowfall and difficult trail conditions make the trek unsafe. You can instead visit Gopinath Temple in Gopeshwar, the winter seat of Rudranath Ji.
2. How long is the Rudranath Trek?
From Sagar Village, the Rudranath Trek is approximately 20–22 km one way. The trek passes through forests, alpine meadows and high-altitude terrain and is considered difficult.
3. Where can I worship Rudranath Ji during winter?
During the winter closure, Rudranath Ji is worshipped at Gopinath Temple in Gopeshwar, the traditional winter seat of Rudranath Ji.
4. What is the Rudranath Temple closing date in 2026?
The Rudranath Temple closing date 2026 is 17 October 2026. If you want to visit before closure, plan your trek several days earlier rather than travelling on the closing date.
5. When does Rudranath Temple close every year?
Rudranath Temple generally closes in October before the winter season. The exact date changes every year according to the Hindu calendar and temple traditions.
6. Can we visit Rudranath in December?
No, a normal pilgrimage trek to Rudranath is not recommended in December. The temple remains closed and the high-altitude trail can receive heavy snowfall and become difficult to access.
7. Is the Rudranath Trek open now?
The Rudranath Trek is open only during the annual pilgrimage season and depends on the temple opening dates, weather and local conditions. Always check the latest trail and temple status before starting your trek.
8. Which Panch Kedar temple remains open for 12 months?
Kalpeshwar Temple is the only Panch Kedar temple that remains open throughout the year. The other four temples close during winter.
9. How many days are required for the Rudranath Trek?
You should plan around 3–4 days for the Rudranath Trek from Sagar Village, including the trek to Rudranath and return to Sagar. The exact duration depends on your route, overnight stops and weather conditions.
10. Is the Rudranath Trek difficult?
Yes. The Rudranath Trek is considered difficult because of its long distance, steep sections, high altitude and remote trail. Good fitness and proper preparation are important before starting the trek.
Everything You Need to Know About Brahmatal Trek in This Winter 2026
Winter transforms the Uttarakhand Himalayas into an entirely different landscape. Oak and rhododendron forests turn white after fresh snowfall, mountain ridges become dramatically sharper against clear skies, and high-altitude lakes begin to freeze as temperatures fall.
Among the many Himalayan Treks available during the colder months, the Brahmatal Trek has become one of the most appealing choices for trekkers looking for snow, forests, frozen-lake scenery and panoramic mountain views without attempting a highly technical expedition.
Located in the Chamoli district of Uttarakhand, Brahmatal is particularly popular from December through February. The trek begins from Lohajung and climbs through dense Himalayan forests towards Bekaltal and Brahmatal before reaching the higher viewpoint around Brahmatal Top.
For anyone planning a winter adventure in 2026, this guide covers the route, difficulty, weather, Brahmatal Lake in Winter, preparation, transportation, Brahmatal Trek Cost, itinerary and practical considerations before booking.
Brahmatal Trek 2026 – Quick Overview
Trek Detail
Information
Trek
Brahmatal Trek
State
Uttarakhand
District
Chamoli
Base Village
Lohajung
Maximum Altitude
Around 12,250 ft / 3,734 m
Duration
Approximately 6 Days
Difficulty
Easy to Moderate / Moderate in winter conditions
Best Winter Period
December to February
Major Attractions
Brahmatal Lake, Bekaltal, snow trails, forests and Himalayan views
The exact route, camping locations and walking distance can vary between operators and according to snow, weather and local trail conditions.
Why Is Brahmatal Trek So Popular in Winter?
There are many excellent Himalayan Treks, but Brahmatal offers an unusually complete winter trekking experience within a relatively short itinerary.
The trail combines forest walking, lake landscapes, snowfields, open ridges and high Himalayan viewpoints. Instead of spending the entire trek inside dense forest, trekkers eventually emerge onto more open terrain where the surrounding mountains become increasingly visible.
That transition is one of Brahmatal’s strongest features.
You begin around the inhabited mountain landscape of Lohajung, enter oak and rhododendron forests, climb towards the lakes and finally reach open snow-covered sections with wide views of the Garhwal Himalayas.
In winter, the same landscape can look dramatically different from one week to another depending on snowfall.
This is also why trekkers should understand one important point before booking:
Snowfall cannot be guaranteed for a particular date.
Winter provides a higher probability of snow and frozen conditions, but fresh snowfall is ultimately controlled by weather systems.
Brahmatal Lake in Winter – What Can You Actually Expect?
Brahmatal Lake in Winter is one of the biggest reasons trekkers choose this route.
As temperatures fall during the winter months, the lake and surrounding landscape can freeze and become covered with snow. The combination of frozen ground, snow-covered slopes and mountain views creates the classic winter scenery associated with Brahmatal.
However, photographs on social media can sometimes create unrealistic expectations.
The lake does not necessarily look identical throughout December, January and February.
Its appearance depends on:
recent snowfall;
overnight temperatures;
daytime sunshine;
ice formation;
wind exposure; and
short-term weather changes.
During colder spells, the lake may appear substantially frozen. During transitional periods, trekkers may encounter a combination of ice, exposed ground and snow.
This variability is part of trekking in a real mountain environment.
Never attempt to walk onto a frozen lake simply because the surface looks solid. Ice thickness is difficult to judge visually, and instructions from trek leaders and local guides should always take priority.
Brahmatal Trek in December 2026
December marks the beginning of the main winter experience at Brahmatal.
Early December can sometimes offer a combination of dry trails, frost and snow at higher elevations. As winter strengthens, the chances of encountering significant snow generally increase, although exact conditions vary every year.
Christmas and New Year departures are particularly popular.
December is a good option for trekkers who want:
winter landscapes;
cold mountain weather;
the possibility of snow;
relatively clear Himalayan views; and
a festive year-end trekking experience.
But if your only reason for booking is to see fresh snowfall on a particular day, keep expectations realistic. No trekking company can accurately guarantee when a snowfall event will occur weeks in advance.
Brahmatal Trek in January 2027
If you are considering the broader Winter 2026–27 season, January usually brings stronger winter conditions.
Snow accumulation can be greater after repeated winter weather systems, while temperatures at higher camps can fall well below freezing at night.
This can make January spectacular—but also more demanding.
Walking through snow requires considerably more effort than walking the same trail when it is dry. Icy sections may also require microspikes or other traction equipment depending on conditions.
January trekkers should be particularly serious about:
thermal layering;
waterproof trekking shoes;
warm gloves;
woollen or synthetic socks;
insulated jackets;
protection from wind;
hydration; and
following the trek leader’s instructions on icy terrain.
Brahmatal Trek in February 2027
February can offer an excellent balance for winter trekkers.
Snow may remain across substantial portions of the higher trail, particularly after recent snowfall, while increasing daytime sunshine can gradually change exposed sections.
This means the trail can contain several types of terrain on the same day:
snow + ice + wet trail + exposed ground.
Trekkers should therefore prepare for mixed conditions rather than assuming the entire trek will consist of soft powder snow.
What Makes Brahmatal Different from Other Himalayan Treks?
The popularity of Brahmatal is not based on a single attraction.
1. Two Beautiful Lake Experiences
Bekaltal and Brahmatal create two distinctive highlights along the route. Their forest and mountain settings become particularly atmospheric during winter.
2. Oak and Rhododendron Forests
The lower sections of the trek pass through dense forests. After snowfall, these sections can become some of the most photogenic parts of the route.
3. Open Ridge Walking
As altitude increases, the landscape gradually opens.
These higher ridges provide a very different trekking experience compared with the forest below.
4. Views of Trishul and Nanda Ghunti
Clear winter conditions can provide striking views towards major Himalayan peaks, particularly Trishul and Nanda Ghunti.
5. Accessible Winter Adventure
Brahmatal does not involve technical mountaineering, making it accessible to physically prepared beginners.
That does not, however, mean the trek should be treated casually. Snow, altitude, cold and long walking hours can turn a straightforward trail into a much more demanding experience.
Brahmatal Trek Itinerary – 6 Days
Roopkund Heaven follows a six-day Brahmatal journey beginning and ending in Rishikesh.
Day 1: Rishikesh to Lohajung
Distance: Approx. 260 km by road Duration: Around 9 hours Altitude: Approx. 7,600 ft / 2,320 m
The journey begins early from Rishikesh and follows the mountain roads through important Garhwal towns and river valleys towards Lohajung.
You travel through areas around Devprayag, Rudraprayag and Karnaprayag before entering the higher mountain landscape leading towards Lohajung.
After arrival, check into your guesthouse, have dinner and prepare your backpack for the trekking days ahead.
It is advisable to sleep early and remain well hydrated.
Day 2: Lohajung to Bekaltal
Trek: Approx. 4 km Duration: Around 4 hours Altitude: Approx. 9,000 ft
The actual trekking begins from Lohajung.
The trail starts climbing through beautiful oak and rhododendron forest. In winter, the condition of the route can range from relatively dry forest trail to snow-covered and icy terrain depending on recent weather.
Bekaltal is the day’s main attraction.
The lake sits within a forested setting and becomes particularly beautiful when winter temperatures freeze the surrounding landscape.
Overnight stay is generally around the Bekaltal area.
Day 3: Bekaltal to Brahmatal
The trail continues towards Brahmatal through progressively higher terrain.
As you climb, forest sections gradually begin opening into broader mountain landscapes.
Winter conditions can significantly affect the pace on this section. Deep or freshly accumulated snow makes walking slower and more physically demanding, while hard-packed ice requires careful footing.
Eventually, you reach the Brahmatal area and settle into camp.
The evening can become extremely cold, so change out of damp trekking layers quickly and put on dry insulation before temperatures fall further.
Day 4: Brahmatal to Brahmatal Top and Back
Maximum altitude: Approx. 12,250 ft / 3,734 m Approximate round-trip trek: 6 km Duration: Around 5 hours
This is generally the most anticipated day of the Brahmatal Trek.
The route climbs towards the higher ridge and Brahmatal Top.
As the forest disappears behind you, the landscape becomes increasingly open. On a clear day, the higher viewpoints can reveal impressive views towards Trishul, Nanda Ghunti and the surrounding Garhwal Himalayas.
Snow conditions determine how demanding the climb feels.
Soft snow consumes more energy, while hard ice can make sections slippery. Trekking poles and appropriate traction equipment can therefore become extremely useful.
After spending time at the viewpoint according to weather and safety conditions, descend towards the Brahmatal campsite.
Day 5: Brahmatal to Lohajung
Trek: Approx. 7 km Duration: Around 5 hours
The descent brings you back towards Lohajung.
Do not underestimate downhill walking in winter.
Frozen trails can be slippery, while snow can hide stones and uneven ground. Trekking poles are useful for improving stability and reducing stress on the knees.
After reaching Lohajung, check into your accommodation and enjoy your final evening in the mountains.
Day 6: Lohajung to Rishikesh
After breakfast, begin the long return drive towards Rishikesh.
Road conditions and mountain traffic can affect arrival time, so travellers should keep a reasonable buffer before booking onward trains, buses or flights.
This completes the six-day Brahmatal journey.
Brahmatal Trek from Dehradun – How to Plan Your Journey
A large number of travellers search for the Brahmatal Trek from Dehradun, particularly those arriving in Uttarakhand by flight, train or bus.
Dehradun is one of the most convenient gateway cities for travellers entering Uttarakhand, while the actual trek starts much deeper inside Chamoli district at Lohajung.
If your trekking package starts from Rishikesh, first travel from Dehradun to the designated Rishikesh pickup point.
Travellers flying into Uttarakhand can arrive via Jolly Grant Airport and continue towards Rishikesh.
Those arriving by train can use Dehradun, Haridwar or Rishikesh depending on their travel plan and train availability.
Because the drive to Lohajung is long, avoid planning a tight connection on the same day.
Mountain roads can be affected by traffic, roadwork, weather and other delays.
Brahmatal Trek Difficulty – Is It Suitable for Beginners?
Brahmatal is generally considered suitable for beginners who have prepared physically before the trek.
The distinction is important.
“Beginner-friendly” does not mean “no fitness required.”
You will still be trekking at altitude, walking uphill for several hours, carrying a daypack and dealing with cold temperatures.
Snow increases the physical effort further.
For someone who exercises regularly and prepares properly, Brahmatal can be an excellent introduction to Himalayan Treks.
For someone who is completely sedentary, the same route can feel considerably harder.
How Fit Should You Be for Brahmatal?
Start preparing at least three to four weeks before departure.
Focus on:
Cardiovascular Fitness
Brisk walking, jogging, cycling or stair climbing can help improve endurance.
Leg Strength
Squats, lunges, step-ups and controlled stair climbing strengthen the muscles used repeatedly during ascent and descent.
Core Stability
A stronger core improves balance while walking over snow and uneven terrain.
Backpack Practice
Complete a few long walks carrying approximately the same weight you expect to carry during the trek.
Consistency
Regular moderate training is generally more useful than attempting an extremely hard workout a few days before departure.
Weather and Temperature on Brahmatal Trek
Winter weather in the Himalayas is inherently variable.
At Lohajung, conditions are generally less severe than at the higher camps. As altitude increases towards Brahmatal and the summit ridge, temperatures can drop significantly.
During peak winter, trekkers should be prepared for sub-zero nights.
Wind chill on exposed ridges can make the temperature feel considerably colder than the actual reading.
Instead of packing according to a single temperature forecast, pack for a range of winter conditions.
What to Pack for Brahmatal Trek in Winter 2026
Winter trekking requires a more deliberate packing strategy than a normal summer hike.
Clothing
Carry:
thermal base layers;
fleece or insulated mid-layer;
down or padded jacket;
waterproof/windproof outer shell;
trekking trousers;
warm cap or balaclava;
sun cap;
waterproof gloves;
multiple pairs of trekking socks.
The objective is layering—not simply wearing one extremely thick jacket.
Footwear
Use proper trekking shoes with:
good ankle support;
strong outsole grip;
water resistance;
adequate toe room; and
compatibility with snow traction devices when necessary.
Avoid starting a winter trek in brand-new shoes. Wear them during training beforehand.
Essential Accessories
Carry:
trekking poles;
sunglasses with UV protection;
sunscreen;
personal water bottles;
headlamp;
rain/wind protection;
personal medicines;
basic toiletries;
power bank;
reusable waterproof bags;
lip balm;
moisturiser; and
personal identification documents.
Your trek operator should provide a final equipment checklist according to expected conditions before departure.
Brahmatal Trek Cost in 2026 – What Should You Budget?
The Brahmatal Trek Cost varies considerably depending on the operator, starting point and inclusions.
Current 2026 market listings show considerable variation: basic Lohajung-based packages can begin in the lower thousands, while more inclusive packages covering transportation, equipment, permits and additional services can cost substantially more.
Instead of choosing a trek purely because it is cheapest, compare exactly what is included.
A proper quotation should clearly explain whether the price covers:
transportation;
accommodation at Lohajung;
tents and camping equipment;
meals during the trek;
trek leader;
local guides/support staff;
forest or trekking permits;
safety equipment;
microspikes/gaiters where required;
sleeping bags;
first-aid and emergency equipment; and
applicable taxes.
Also check exclusions such as personal gear rental, insurance, offloading, emergency evacuation and meals during road journeys.
Important: Check the current Roopkund Heaven departure price before publishing or booking, because trek costs can change by departure date and inclusions.
Is the Cheapest Brahmatal Trek Package a Good Idea?
Not necessarily.
Winter trekking logistics cost money.
Accommodation, food, trained staff, safety equipment, transportation, permits and quality camping equipment all contribute to the package price.
A suspiciously cheap package may compromise somewhere.
Before booking, ask:
What happens if weather deteriorates?
What safety equipment does the team carry?
How experienced is the trek leader?
How many trekkers are assigned to each leader?
What sleeping bags are provided?
Are permits included?
What is the evacuation procedure?
These questions are more useful than comparing packages based on price alone.
Important Winter 2026 Update for Brahmatal Trekkers
Trekkers planning Brahmatal during the 2026–27 winter season should keep several practical points in mind.
Snow Conditions Change Quickly
Early December does not automatically mean deep snow, and one snowfall event can dramatically change trail conditions within hours.
Weather Can Alter the Itinerary
Heavy snowfall, poor visibility or unsafe trail conditions may require trek leaders to modify timings, campsites or the summit plan.
Road Conditions Matter
The journey towards Lohajung involves long mountain roads. Winter weather can occasionally affect travel time.
Permits and Local Regulations Should Be Confirmed
Forest and local administrative requirements can change. Confirm current permits and route regulations with your operator before departure.
Summit Safety Comes Before Completion
Reaching Brahmatal Top is an important goal, but it is never more important than safety.
The trek leader’s decision regarding weather, snow or turnaround time should be considered final.
Common Mistakes First-Time Brahmatal Trekkers Make
One of the biggest mistakes is focusing entirely on snowfall and ignoring everything else that makes the trek special.
Another is underestimating winter.
Poor-quality shoes, cotton clothing, inadequate gloves and insufficient layering can make an otherwise enjoyable trek uncomfortable.
Other common mistakes include:
carrying an unnecessarily heavy backpack;
failing to train beforehand;
drinking too little water because of cold weather;
ignoring sunscreen in winter;
walking too fast on the first day;
not keeping dry clothes separately;
booking tight onward travel after the trek; and
assuming “easy to moderate” means effortless.
Preparation matters considerably more than trekking experience alone.
Who Should Choose the Brahmatal Trek?
Brahmatal is particularly suitable for:
First-time Himalayan trekkers who have adequate fitness and want to experience winter trekking.
Snow lovers looking for a genuine Himalayan winter environment.
Photographers interested in forests, frozen landscapes, ridges and mountain panoramas.
Experienced trekkers looking for a relatively short winter trail.
Groups and solo travellers joining organised departures with experienced leaders.
Who Should Reconsider the Trek?
Brahmatal may not be suitable without additional preparation or professional advice for people who:
have extremely low fitness levels;
have significant medical concerns;
are uncomfortable with sub-zero temperatures;
expect luxury accommodation throughout;
are unwilling to walk for several hours daily; or
expect guaranteed snowfall on a particular date.
Anyone with an existing medical condition should seek appropriate medical advice before undertaking a high-altitude trek.
Why Brahmatal Deserves a Place on Your Winter 2026–27 Trekking List
The Brahmatal Trek succeeds because it does not rely on one spectacular moment.
The journey itself keeps changing.
You begin in a Himalayan village, climb through dense oak and rhododendron forest, encounter Bekaltal, move towards Brahmatal Lake in Winter, walk across higher snow-covered terrain and finally reach panoramic ridges overlooking some of Uttarakhand’s most impressive mountains.
That variety makes Brahmatal one of the most rewarding short Himalayan Treks for the winter season.
It is challenging enough to feel like a genuine mountain journey, yet accessible enough for fit beginners to consider as their first winter trek.
If you are planning the Brahmatal Trek from Dehradun or Rishikesh during Winter 2026–27, plan early, train properly and choose your trekking team based on safety and operational quality rather than price alone.
Most importantly, arrive with realistic expectations.
You cannot schedule snowfall.
You cannot control mountain weather.
And you cannot guarantee that every photograph will show a perfectly frozen white landscape.
What you can do is arrive prepared for the Himalayas as they actually are—and that unpredictability is part of what makes Brahmatal worth trekking.
Frequently Asked Questions About Brahmatal Trek 2026
1. What is the best time for Brahmatal Trek in winter?
December to February is the main winter period for Brahmatal. December marks the transition into stronger winter conditions, January is generally colder, and February can still retain significant snow at higher elevations. Exact snow conditions vary from year to year.
2. Is Brahmatal Trek suitable for beginners?
Yes. The Brahmatal Trek can be suitable for fit beginners because it does not require technical mountaineering skills. However, trekkers should prepare for altitude, snow, steep sections, cold temperatures and several hours of walking each day.
3. What is the Brahmatal Trek Cost in 2026?
The Brahmatal Trek Cost depends on the operator, departure point and inclusions. Compare transportation, accommodation, meals, permits, trek leadership, camping equipment and safety support before evaluating the final price.
4. Is Brahmatal Lake completely frozen in winter?
Brahmatal Lake in Winter can become substantially frozen during sustained cold conditions, particularly in peak winter. However, the degree of freezing depends on recent temperatures, snowfall and weather. Trekkers should never walk onto lake ice unless specifically declared safe by qualified local professionals.
5. Can we see snowfall during the Brahmatal Trek?
Possibly, but fresh snowfall cannot be guaranteed. You may encounter accumulated snow even when it does not snow during your actual trek.
6. How difficult is the Brahmatal Trek in December and January?
The route is generally considered beginner-friendly to moderate, but snow and ice can significantly increase the difficulty. January can be particularly cold, so good fitness and proper winter gear are important.
7. How can I plan the Brahmatal Trek from Dehradun?
For the Brahmatal Trek from Dehradun, travellers can first reach Rishikesh and continue towards Lohajung through the Garhwal region. If your organised trek begins from Rishikesh, reach the designated pickup point before the scheduled departure time.
8. What is the maximum altitude of Brahmatal Trek?
The Roopkund Heaven itinerary reaches approximately 12,250 feet (3,734 metres) around Brahmatal Top.
9. Which Himalayan peaks are visible from Brahmatal?
On clear days, trekkers can enjoy impressive views towards Mt. Trishul, Nanda Ghunti and other peaks of the Garhwal Himalayas from the higher sections of the trail.
10. Is December 2026 a good time for Brahmatal Trek?
Yes. December is one of the most popular periods for the trek. However, snow depth varies during the month, so trekkers should not assume that early December and late December will have identical trail conditions.
11. Is January better than December for Brahmatal?
It depends on what you want. January generally offers stronger winter conditions and colder temperatures, while December can provide a transitional winter experience. Neither month can guarantee fresh snowfall on your trekking dates.
12. Do I need microspikes for Brahmatal Trek?
They may be required when the trail becomes hard-packed or icy. Your trek leader should decide when traction equipment is necessary according to actual trail conditions.
13. How many days are required for Brahmatal Trek?
A complete itinerary generally requires around 5–6 days, depending on the starting point and route. Roopkund Heaven’s itinerary is planned as a 6-day journey from Rishikesh to Rishikesh.
14. Is Brahmatal one of the best Himalayan Treks for winter?
For trekkers looking for a combination of snow, forests, alpine lakes, ridge walking and major Himalayan views within a relatively accessible itinerary, Brahmatal is certainly one of Uttarakhand’s strongest winter trekking options.
Conclusion
Winter trekking is not simply about finding snow.
It is about learning to move through a mountain environment where temperatures, trail conditions and weather can change rapidly.
The Brahmatal Trek offers that experience without requiring technical mountaineering. Its frozen landscapes, forests, high ridges and views towards Trishul and Nanda Ghunti make it an excellent choice for the Winter 2026–27 Himalayan trekking season.
For those planning the journey with Roopkund Heaven, prepare your fitness, invest in proper winter clothing, understand the realities of mountain weather and leave enough flexibility in your travel schedule.
With the post-monsoon trekking season approaching, the Roopkund trail is once again preparing to welcome trekkers into one of the most fascinating landscapes of the Uttarakhand Himalayas. From the forests around Lohajung and Didina to the vast alpine meadows of Ali and Bedni Bugyal, the trail gradually climbs towards the rugged high-altitude terrain of Patarnauchani, Bhagwabasa and the legendary Roopkund Lake.
At Roopkund Heaven, our September–October 2026 Roopkund Trek season is scheduled to begin from 19 September 2026.
Roopkund Trek – Current Season Update
Region: Uttarakhand Base Camp: Lohajung Maximum Altitude: 15,696 ft Trek Duration: 7 Nights / 8 Days Trekking Distance: Approx. 53 km Difficulty: Moderate to Difficult Best Season: Mid-September to October
The second half of September marks an important transition in the mountains. As the monsoon begins to withdraw, the landscape around Ali and Bedni Bugyal remains beautifully green, while clearer weather windows gradually improve the views of the surrounding Himalayan peaks.
The upper sections beyond Bedni Bugyal are significantly more exposed and demanding. Trekkers should be prepared for colder temperatures, rapidly changing mountain weather and the effects of increasing altitude as the route progresses towards Bhagwabasa and Roopkund.
What Will the Roopkund Trail Look Like in September?
One of the biggest attractions of a September Roopkund trek is the contrast in landscapes.
The journey begins around Lohajung at 7,650 ft, followed by forest trails towards Didina. As trekkers climb higher, the dense forests eventually open into the spectacular grasslands of Ali Bedni Bugyal trek.
Beyond the meadows, the character of the trek changes.
The route climbs towards Patarnauchani at approximately 13,500 ft, followed by Bhagwabasa at around 14,500 ft. Vegetation becomes sparse, temperatures fall and the terrain becomes increasingly rocky and exposed.
The final climb leads towards Roopkund Lake at 15,696 ft, situated beneath the imposing Trishul massif.
Upcoming Roopkund Trek Batches
Roopkund Heaven’s upcoming September batches are scheduled for:
19 September 2026 20 September 2026 26 September 2026 27 September 2026
October departures are also scheduled throughout the month.
These post-monsoon departures are planned during one of the preferred windows for experiencing the Roopkund trail.
What Trekkers Can Expect on the Route
Lohajung to Didina
The trek begins from Lohajung and gradually takes trekkers into oak, rhododendron and Himalayan forest terrain. This section provides the transition from the roadhead into the wilderness of the Roopkund trail.
Didina to Ali Bugyal
This is where the landscape changes dramatically.
After climbing through the forest, trekkers emerge onto the enormous alpine grasslands of Ali Bugyal, with expansive Himalayan views opening up around the trail.
Ali Bugyal – Bedni Bugyal – Patarnauchani
The route continues across the celebrated meadows of Ali and Bedni before climbing towards Patarnauchani.
This section is particularly important for acclimatization as the trek moves rapidly from approximately 11,000 ft towards the 13,000 ft altitude zone.
Patarnauchani to Bhagwabasa
From here, the trek enters serious high-altitude terrain.
The green meadows gradually disappear and are replaced by rocky slopes, exposed ridges and colder conditions. Bhagwabasa serves as the high camp before the final approach towards Roopkund.
Bhagwabasa to Roopkund Lake
The final climb towards Roopkund Lake at 15,696 ft is the most demanding section of the journey.
An early start, controlled pace and proper acclimatization are essential. At this altitude, weather and trail conditions can change quickly, and the final movement should always depend on the assessment of the trek leader and ground team.
Weather Advisory for September Trekkers
September in the Himalayas is a transition period, so trekkers should come prepared for varying conditions.
Lower sections can experience occasional rain and wet trails, while the higher camps can become considerably colder, particularly during the night and early morning.
Trekkers should carry proper waterproof protection, warm layers, gloves, head protection and trekking shoes with reliable grip.
A trekking pole is particularly useful on wet descents and uneven high-altitude sections.
Roopkund Is Not a Beginner Trek
Despite its famous meadows and beautiful landscapes, Roopkund should not be underestimated.
The trek reaches 15,696 ft, involves multiple days of continuous altitude gain and includes a demanding summit-day-style push towards the lake.
Trekkers should arrive with good cardiovascular endurance, leg strength and prior trekking experience wherever possible.
More importantly, trekkers must be willing to follow the instructions of the trek leader regarding pace, acclimatization, weather and turnaround decisions.
Roopkund Heaven Ground Note
For us, a successful Roopkund trek is not simply about reaching the lake.
It is about moving safely through every stage of the journey—from Lohajung and Didina to Ali Bugyal, Bedni Bugyal, Patarnauchani and Bhagwabasa—while allowing the body enough time to adjust to increasing altitude.
Weather conditions, trail conditions and individual fitness will always determine the final movement of a batch.
The mountains decide the pace. We respect it.
Preparing for Your Upcoming Roopkund Trek
If you are joining one of our September or October departures, use the remaining time to focus on regular cardio training, stair climbing, strength exercises and long walks.
Break in your trekking shoes before arriving, avoid carrying unnecessary weight and make sure your rain and cold-weather gear is suitable for Himalayan conditions.
Most importantly, arrive physically prepared rather than expecting to build fitness during the trek itself.
Next Roopkund Trek Update
As our first September batches begin moving from Lohajung, we will continue sharing updates from the trail—including batch movements, campsite progress, weather observations and conditions from different sections of the Roopkund route.
The Roopkund season is about to begin.
And after years of waiting, the trail to one of the Himalayas’ most mysterious lakes is calling trekkers once again.
Best Himalayan Treks to do in Winter 2026, Calender
Winter changes the Himalayas completely.
The green meadows of summer disappear beneath snow, forest trails become quieter, frozen lakes replace open water, and some of Uttarakhand’s most familiar trekking routes take on an entirely different character. But winter trekking is not simply about finding snow. The right trek depends on the month, altitude, trail conditions, fitness level, road accessibility and the kind of Himalayan experience you want.
If you are planning Himalayan treks in winter 2026, this guide will help you understand which routes are worth considering and, equally importantly, when to plan them.
Among the most popular winter choices in Uttarakhand are the Brahmatal Trek, Kedarkantha Trek, Kuari Pass Trek and Dayara Bugyal. The Ali Bedni Bugyal trek is another outstanding Uttarakhand trail, but it should be planned outside the core winter season because heavy snow closes the route during winter.
This Uttarakhand Trekking Calendar 2026 compares the major routes month by month so that you can choose a trek based on actual seasonal suitability rather than simply selecting the most popular name.
Why Choose the Himalayas for a Winter Trek?
A winter trek is very different from trekking the same trail in spring, summer or autumn.
Between December and March, snowfall can transform the landscape into continuous stretches of white. Forests become quieter, alpine clearings are covered with snow, temperatures fall well below freezing at higher camps, and distant Himalayan summits can appear exceptionally sharp on clear days.
Winter trekking can offer:
Snow-covered forests and campsites
Frozen or partially frozen alpine lakes
Clear mountain panoramas on stable-weather days
Fewer trekkers on selected trails
Dramatic sunrise and sunset conditions
A genuine introduction to trekking on snow
A very different Himalayan landscape from the summer trekking season
However, winter also introduces additional challenges.
Snow depth, black ice, sub-zero nights, shorter daylight hours, changing road conditions and sudden weather systems can make an otherwise moderate trail significantly harder.
That is why choosing the correct route and month matters.
Uttarakhand Winter Trekking Calendar 2026 at a Glance
Trek
Best Winter Window
Approx. Highest Altitude
Difficulty
Best Known For
Kedarkantha Trek
December–March
12,500 ft
Easy to Moderate
Summit experience, snow forests and Juda Ka Taal
Brahmatal Trek
December–March
Around 12,000+ ft
Moderate
Alpine lake, snow trails and Trishul views
Kuari Pass Trek
December–February
Around 12,000 ft
Moderate
Big Himalayan mountain views
Dayara Bugyal
December–March
Around 12,000 ft
Easy to Moderate
Vast snow-covered alpine meadows
Ali Bedni Bugyal Trek
Not recommended in core winter
High-altitude meadow route
Moderate
Ali and Bedni Bugyal, Trishul and Nanda Ghunti
Important: Winter conditions vary from year to year. Snowfall dates, accumulation and route accessibility cannot be guaranteed simply from the calendar. Always check current trail and weather conditions before departure.
1. Kedarkantha Trek – The Classic Winter Summit Experience
For many trekkers, the Kedarkantha Trek is the first name that comes to mind when discussing winter trekking in Uttarakhand.
The trek begins from the Sankri region and climbs through pine and oak forests towards Juda Ka Taal, Kedarkantha Base Camp and finally Kedarkantha summit.
The summit reaches approximately 12,500 ft (3,810 m).
What makes Kedarkantha particularly suitable for winter is the combination of manageable altitude, forest sections, established campsites and a proper summit day. In peak winter, the route can be covered in snow and Juda Ka Taal may freeze.
Why Choose Kedarkantha in Winter?
The biggest attraction is progression.
You do not see everything on the first day. The landscape changes gradually as you gain altitude.
The route moves from mountain villages into forest, from forest into snow-covered clearings, and finally towards an exposed summit ridge.
From the summit area, trekkers can experience broad views towards several major ranges of the western Garhwal Himalayas.
Best Months for Kedarkantha Trek
December: Good for early winter conditions and the possibility of fresh snowfall.
January: One of the strongest months if your priority is a proper snow-trekking experience.
February: Snow generally remains at higher elevations while daylight conditions gradually improve.
March: A good transition period, although snow coverage depends heavily on the winter’s snowfall.
Who Should Choose Kedarkantha?
Consider Kedarkantha if:
You are attempting your first winter Himalayan trek.
You want a summit-oriented itinerary.
Snow is one of your main priorities.
You are comfortable with cold nights.
You want a relatively short Himalayan trekking itinerary.
The trek is classified as easy to moderate, but that should not be confused with effortless. Summit day, snow depth and low temperatures can substantially increase the physical demand.
2. Brahmatal Trek – Snow, Forests and an Alpine Lake
The Brahmatal Trek is another major winter trekking route in Uttarakhand and provides a noticeably different experience from Kedarkantha.
Rather than being defined primarily by a summit, Brahmatal is about the complete landscape: forests, high-altitude clearings, snowfields, an alpine lake and views towards major peaks including Trishul and Nanda Ghunti.
Lohajung acts as the principal base for the trek.
Why Is Brahmatal Special in Winter?
Brahmatal has become popular because it retains the feeling of a high Himalayan journey while remaining accessible to reasonably fit trekkers.
During the winter season, snowfall can transform the upper sections of the trail. The combination of white forest trails and large mountain faces in the distance creates a very different visual experience from a conventional summer meadow trek.
Best Time for Brahmatal Trek
December: The winter landscape begins developing as snowfall reaches higher sections.
January: Usually one of the most attractive periods for trekkers specifically looking for snow.
February: Often provides a good combination of existing snow and winter mountain scenery.
March: Conditions begin transitioning towards spring, although snow can remain at higher elevations.
Brahmatal vs Kedarkantha
This is one of the most common comparisons made by first-time winter trekkers.
Choose Kedarkantha if a summit experience is your biggest priority.
Choose Brahmatal if you are more interested in a varied trail involving forest, snow, an alpine lake and extended views of major Himalayan peaks.
Neither trek is universally “better.” They deliver different experiences.
3. Kuari Pass Trek – For Grand Himalayan Views
If your idea of a Himalayan trek is standing on a high trail surrounded by enormous snow-covered peaks, the Kuari Pass Trek deserves serious consideration.
The Kuari Pass region is famous for its mountain panorama, with views towards some of the most significant peaks of the Garhwal Himalayas.
The trek is generally approached through the Joshimath/Jyotirmath region.
In winter, the landscape changes considerably. Snow covers the upper forest and meadow sections, while clear-weather days can offer striking visibility towards the surrounding mountains.
Why Trek Kuari Pass in Winter?
Kuari Pass is less about chasing one summit and more about trekking through a landscape dominated by the high Himalayas.
Depending on the exact route and conditions, trekkers move through oak and rhododendron forests, snow-covered open sections and high ridges.
The upper route can become substantially more technical under snow and ice. Microspikes and careful movement may be required depending on trail conditions.
Best Winter Months
December: Early winter conditions with snow increasingly likely at higher elevations.
January: Deep winter. Expect low temperatures and potentially significant snow.
February: Excellent winter landscapes can continue, with snow persisting on upper sections.
Conditions in winter can change quickly, so the final route should always be based on local trail assessment.
Who Should Choose Kuari Pass?
Kuari Pass works particularly well for trekkers who:
Prioritise mountain views over a summit objective
Have reasonable trekking fitness
Want a more serious winter trekking experience
Are comfortable walking on snow
Want to experience the Joshimath/Auli side of Uttarakhand
Auli itself is one of Uttarakhand’s major winter destinations and is surrounded by oak and coniferous forests with views towards Nanda Devi and other major Himalayan peaks.
4. Dayara Bugyal – A Vast Himalayan Meadow Under Snow
Dayara BugyalTrek is one of Uttarakhand’s best-known high-altitude meadow landscapes.
In summer, the attraction is an enormous carpet of green. Winter creates almost the opposite scene: an expansive white landscape surrounded by snow-covered mountains.
The trek is commonly approached from Raithal in Uttarkashi district and reaches approximately 12,250 ft on the higher sections of the route.
Why Choose Dayara Bugyal in Winter?
The openness of the landscape is the biggest reason.
While Kedarkantha and Brahmatal include significant forest sections, Dayara eventually opens into enormous alpine meadows.
Under good snow conditions, these meadows become huge white expanses with panoramic views towards peaks such as Bandarpoonch, Draupadi Ka Danda, Srikanth and Kalanag.
Best Winter Months
December: Excellent for the transition from late autumn towards winter.
January: Strong potential for a classic snow-covered Dayara landscape.
February: One of the most balanced months for winter trekking.
March: Snow may remain on upper sections, but conditions increasingly depend on temperature and snowfall patterns.
Is Dayara Bugyal Suitable for Beginners?
For a fit beginner travelling with proper guidance, Dayara Bugyal can be an excellent introduction to the Himalayas.
However, difficulty ratings should always be treated as seasonal.
A trail described as easy to moderate in dry conditions can feel considerably harder after heavy snowfall.
What About the Ali Bedni Bugyal Trek in Winter?
This distinction is important.
The Ali Bedni Bugyal trek is one of Uttarakhand’s finest meadow treks, but it should not be marketed as a regular December–February winter trek.
The route towards Ali and Bedni Bugyal provides exceptional views towards Trishul and Nanda Ghunti and is known for its vast alpine grasslands.
However, Roopkund Heaven’s current route information notes that the trek closes during the winter period from approximately November to April, when heavy snowfall can make the trail impassable.
Therefore, if Ali Bedni Bugyal is on your 2026 trekking list, plan it for the appropriate non-winter operating season rather than forcing it into a winter itinerary.
This is an important part of responsible Himalayan trek planning: not every beautiful Himalayan trail should be attempted in every season.
Month-by-Month Uttarakhand Trekking Calendar 2026
The correct trek often becomes much easier to choose once you decide your travel month.
December 2026 – Beginning of the Winter Trekking Season
December is the transition into proper Himalayan winter.
Early December can have relatively limited snow depending on the year. As western disturbances begin bringing precipitation, snow accumulation generally increases at higher elevations.
Recommended Options
Kedarkantha Trek
Brahmatal Trek
Kuari Pass Trek
Dayara Bugyal
Best For
Trekkers looking for cold conditions without necessarily experiencing the deepest snow of the season.
Do not book December solely on the assumption that every trail will already have deep snow. Himalayan snowfall is weather-dependent, not calendar-dependent.
January 2026 – Peak Winter Conditions
January is generally the month most people imagine when they think of winter Himalayan treks.
Temperatures are low, snow can be deep at higher camps and nights can fall well below freezing.
Recommended Options
Kedarkantha: Excellent for a classic snow-and-summit experience.
Brahmatal: Strong choice for forests, lake scenery and mountain views.
Dayara Bugyal: Excellent for expansive snow-covered meadows.
Kuari Pass: Ideal for experienced and well-prepared trekkers seeking mountain panoramas in winter conditions.
Keep in Mind
January demands better equipment and preparation.
Water can freeze overnight, trails can become icy, road journeys may be delayed and summit/pass attempts can change because of weather.
Keep a buffer day whenever possible.
February 2026 – One of the Most Balanced Winter Months
February can be an excellent month for winter trekking.
Snow from previous winter systems may remain at altitude while the days gradually become longer.
For many trekkers, February provides a strong balance between winter scenery and slightly more manageable conditions than the coldest part of January.
Recommended Options
Brahmatal Trek
Kedarkantha Trek
Kuari Pass Trek
Dayara Bugyal
February is particularly useful for travellers who want a genuine winter experience but do not necessarily want to travel around the Christmas/New Year peak period.
March 2026 – Winter Begins Turning to Spring
March is a transition month.
Lower-altitude snow starts melting while snow can remain on upper slopes, shaded forests and high ridges.
This means conditions can differ dramatically from one route to another.
Good March Options
Kedarkantha
Brahmatal
Dayara Bugyal
Kuari Pass conditions should be checked carefully before departure because snow and ice on exposed sections can materially change the route.
March is an excellent choice for trekkers who prefer slightly milder temperatures but still want the possibility of snow.
November 2026 – Pre-Winter Trekking
November deserves a separate category.
It is not necessarily a snow month, but it can be one of the best periods for clear Himalayan views.
Post-monsoon skies are often crisp, vegetation has shifted towards autumn colours and the intense winter cold has not fully arrived.
If your primary objective is mountain visibility rather than snow, November can sometimes be a better choice than December.
Which Winter Trek Should You Choose?
There is no single “best” winter trek for everyone.
Choose Kedarkantha if:
You want a recognisable summit objective and a classic first winter trek.
Choose Brahmatal if:
You want snow, forests, an alpine lake and close Himalayan mountain views.
Choose Kuari Pass if:
Big mountain panoramas are your highest priority.
Choose Dayara Bugyal if:
You want huge open snow-covered meadows and a comparatively beginner-friendly itinerary.
Choose Ali Bedni Bugyal if:
You love alpine meadows and views of Trishul and Nanda Ghunti — but plan it outside the core winter closure period.
Brahmatal vs Kedarkantha vs Kuari Pass vs Dayara Bugyal
Factor
Brahmatal
Kedarkantha
Kuari Pass
Dayara Bugyal
Snow Experience
Excellent
Excellent
Excellent
Excellent
Summit Experience
Limited
Excellent
Pass crossing/viewpoint
Meadow/high point
Forest Trail
Excellent
Excellent
Excellent
Good
Open Meadows
Good
Moderate
Excellent
Excellent
Mountain Views
Excellent
Excellent
Outstanding
Excellent
Beginner Friendly
Moderate
Good
Moderate
Good
Winter Challenge
Moderate
Moderate
Moderate–Higher
Moderate
Best For
Variety
Summit
Mountain panorama
Snow meadows
How Difficult Are Himalayan Treks in Winter?
A common mistake is looking only at a trek’s standard difficulty rating.
Winter changes that rating in practical terms.
A moderate trail covered with packed snow, fresh snow or ice requires more energy and concentration than the same trail in October.
Several factors increase winter difficulty:
1. Snow Depth
Fresh snow slows walking considerably. Every step requires additional effort, particularly when breaking trail.
2. Sub-Zero Temperatures
Cold affects sleep, hydration, batteries, water availability and overall energy levels.
3. Shorter Daylight Hours
Winter trekking requires stricter time management because usable daylight is limited.
4. Ice
Packed snow can turn into hard ice, particularly on shaded sections and early in the morning.
5. Weather Changes
Fresh snowfall, high winds or poor visibility can alter the itinerary.
This is why a winter trek should never be judged purely by kilometres or altitude.
Essential Fitness for a Winter Himalayan Trek
You do not need to be an athlete to complete many beginner-to-moderate Himalayan treks, but you do need cardiovascular endurance, leg strength and the ability to walk continuously for several hours.
Start preparing at least four to six weeks before departure.
A useful routine can include:
Brisk walking or jogging
Stair climbing
Squats and lunges
Core-strength exercises
Weekend hikes
Walking with a light backpack
More important than speed is consistency.
You should be comfortable walking uphill for extended periods without becoming completely exhausted.
What to Pack for a Winter Trek in Uttarakhand
Packing for winter is about layering rather than carrying one extremely heavy jacket.
Clothing
Carry:
Moisture-wicking base layers
Fleece or insulated mid-layer
Down or synthetic insulated jacket
Waterproof/windproof outer shell
Trekking pants
Thermal layers
Warm cap
Sun cap
Neck warmer/buff
Waterproof gloves
Multiple trekking socks
Footwear
Use proper trekking shoes with good ankle support and traction.
Depending on snow and ice conditions, gaiters and microspikes may be required.
Other Essentials
Sunglasses with UV protection
Sunscreen
Headlamp
Trekking poles
Personal medicines
Water bottles
Backpack and rain cover
Personal hygiene kit
Power bank
Small dry bags or waterproof pouches
Avoid cotton as your primary cold-weather layer because it retains moisture and dries slowly.
A summit, pass or viewpoint is optional. Returning safely is not.
Follow Your Trek Leader
Snow can hide trail edges, rocks and slippery sections. Local trail knowledge becomes especially important in winter.
Hydrate Even When You Are Not Thirsty
Cold suppresses thirst, but your body still loses water.
Protect Yourself From UV Exposure
Snow reflects sunlight and can significantly increase UV exposure. Sunglasses and sunscreen are essential.
Do Not Ignore Symptoms of Altitude Illness
Headache, nausea, unusual fatigue, dizziness and loss of appetite should be reported to your trek leader.
Keep Buffer Time
Weather can delay both trekking itineraries and road travel.
Snowfall Is Never Guaranteed
This point is especially important when planning a winter trek.
Booking a Himalayan trek for a particular date does not guarantee fresh snowfall.
Snowfall varies substantially between years.
For example, parts of Uttarakhand experienced unusually dry conditions during the 2025–26 winter, illustrating why travellers should not treat historical snowfall patterns as guaranteed forecasts.
What operators can reasonably tell you is:
Whether snow is currently present
Approximate snow depth
Recent snowfall
Current trail accessibility
Short-range weather forecasts
Nobody can responsibly guarantee that it will snow on your exact trekking dates months in advance.
Responsible Winter Trekking
The popularity of Himalayan treks creates environmental pressure on mountain villages, forests and campsites.
Every trekker should follow basic Leave No Trace principles:
Do not leave plastic or food packaging on the trail.
Carry personal waste back where required.
Do not disturb wildlife.
Avoid unnecessary loud music.
Respect village customs.
Do not damage vegetation for photographs or campsites.
Use designated toilet and camping areas.
Follow instructions regarding protected forests and local regulations.
The Himalayas should look the same after your group leaves as they did before you arrived.
Complete Winter Trek Selection Guide
If you are still undecided, use this simple framework.
First winter trek: Kedarkantha or Dayara Bugyal
Want a summit: Kedarkantha
Want an alpine lake: Brahmatal
Want the biggest mountain views: Kuari Pass
Want huge snow meadows: Dayara Bugyal
Want Trishul and Nanda Ghunti with beautiful bugyals outside winter: Ali Bedni Bugyal trek
Want peak snow conditions: Usually January–February, subject to actual snowfall
Want less severe cold: Late February–March
Want clear mountain views without depending on snow: November
Conclusion: Planning Your Himalayan Winter Trek in 2026
The best winter trek is not necessarily the trek with the deepest snow or the highest altitude.
It is the route that matches your fitness, previous trekking experience, preferred landscape, available dates and comfort with winter conditions.
The Kedarkantha Trek remains a strong choice for trekkers seeking a summit-focused winter adventure. The Brahmatal Trek offers an excellent combination of snow, forest, lake and mountain scenery. The Kuari Pass Trek stands out for its grand Himalayan panorama, while Dayara Bugyal is hard to beat if your dream is to walk across vast snow-covered alpine meadows.
And although the Ali Bedni Bugyal trek belongs on any serious Uttarakhand trekking list, it is best planned during its appropriate operating season rather than the core winter months.
Use this Uttarakhand Trekking Calendaras a starting point, then check current weather, snow conditions, road access and route status before confirming your departure.
Winter in the Himalayas rewards preparation.
Choose the right trail, prepare properly, respect the mountains and the experience can become one of the most memorable journeys you undertake.
Frequently Asked Questions About Winter Himalayan Treks
1. Which is the best winter trek in Uttarakhand in 2026?
There is no universal best trek. Kedarkantha is excellent for a summit-focused experience, Brahmatal for snow and alpine scenery, Kuari Pass for major Himalayan views and Dayara Bugyal for vast snow-covered meadows.
2. Which winter trek is best for beginners?
Kedarkantha and Dayara Bugyal are commonly considered good options for physically fit beginners travelling with experienced trek leaders. Actual difficulty depends on snow, temperature and trail conditions.
3. Is Kedarkantha better than Brahmatal?
Kedarkantha is usually better if reaching a summit is your priority. Brahmatal is better suited to trekkers looking for a combination of forests, snow, an alpine lake and mountain views. The choice depends on the experience you want.
4. Which month is best for snow trekking in Uttarakhand?
January and February are generally the strongest months for established winter snow conditions on popular Uttarakhand trekking routes. However, snowfall varies every year and cannot be guaranteed.
5. Can beginners do the Brahmatal Trek?
Fit beginners can attempt Brahmatal with proper preparation and professional guidance. Snow and low temperatures make winter conditions more demanding than dry-season trekking.
6. Is Kuari Pass Trek open in winter?
Kuari Pass is trekked during winter, but heavy snowfall or unsafe conditions can alter the route or prevent access to particular sections. Current conditions should always be checked before departure.
7. Is Dayara Bugyal worth visiting in winter?
Yes. Dayara Bugyal is particularly impressive after snowfall because its vast alpine meadows become large open snowfields surrounded by Himalayan peaks.
8. Can I do the Ali Bedni Bugyal trek in December or January?
It should not be treated as a standard winter trek. Heavy snowfall closes the route during the core winter period, so Ali Bedni Bugyal should be planned during its suitable operating season.
9. Will I definitely get snow on a December trek?
No. December snowfall varies considerably between years. Higher elevations may already have snow while lower trails can remain dry. Fresh snowfall on your exact travel dates can never be guaranteed months in advance.
10. How cold does a winter Himalayan trek get?
Temperatures depend on altitude, month, weather and campsite. At higher winter camps, nighttime temperatures can fall well below 0°C and may reach around -10°C or lower on some routes during severe conditions.
11. Do I need previous trekking experience for a winter trek?
Not necessarily. Several beginner-friendly Himalayan treks can be attempted as a first trek, but good cardiovascular fitness and appropriate winter preparation are essential.
12. What is the best winter trek for photography?
Kuari Pass is exceptional for large mountain panoramas, Dayara Bugyal for minimalist snow landscapes, Brahmatal for varied compositions and Kedarkantha for forest, snow and summit photography.
13. Are Himalayan winter treks safe?
They can be undertaken safely when weather conditions are suitable and the trek is managed by experienced professionals with appropriate equipment, route knowledge and emergency protocols. No high-altitude trek is completely risk-free.
14. How early should I book a winter trek in Uttarakhand?
For Christmas, New Year and other high-demand winter dates, booking several weeks in advance is sensible. Outside peak dates, availability may be better, but transport and accommodation should still be organised in advance.
15. Which is best for winter: Kedarkantha, Brahmatal, Kuari Pass or Dayara Bugyal?
Choose according to your objective: Kedarkantha for a summit, Brahmatal for a complete snow-trail experience, Kuari Pass for mountain views and Dayara Bugyal for expansive snow meadows.
10 Questions to Ask Before Booking a Himalayan Trekking Company
A Himalayan trek can be one of the most memorable adventures of your life. Walking through alpine meadows, dense forests, remote mountain villages, and high-altitude landscapes offers an experience that is difficult to find anywhere else.
But the quality and safety of your trek depend heavily on the trekking company you choose.
A reliable trekking company should have experienced guides, a clear safety system, transparent pricing, appropriate equipment, responsible trekking practices, and strong knowledge of the region.
Before making your booking, ask these 10 important questions.
1. How Experienced Is the Trekking Company?
The first thing to understand is how much actual Himalayan trekking experience the company has.
There is a major difference between simply selling a trekking package and actually managing groups in remote mountain terrain. An experienced local trekking company understands trail conditions, weather patterns, altitude-related challenges, campsite logistics, local regulations, and emergency procedures.
Ask the company:
How long have you been organizing Himalayan treks?
Which regions do you regularly operate in?
Do you have your own ground team?
How familiar are your guides with this particular route?
This becomes particularly important on high-altitude routes such as the Roopkund trek, where terrain, weather, and regulations can significantly affect the itinerary.
At Roopkund Heaven, our trekking experiences are rooted in Uttarakhand, giving our team practical knowledge of the trails, villages, weather conditions, and mountain environment in which we operate.
2. Who Will Be Leading the Trek?
A beautiful itinerary means very little if the person leading your group does not have sufficient mountain experience.
Your trek leader or guide is one of the most important people on the expedition. They are responsible for managing the group, assessing trail and weather conditions, maintaining the trekking schedule, and responding appropriately when someone experiences difficulty.
Before booking, ask about the experience of the trek leaders and support staff.
A good guide should understand:
High-altitude trekking
Route navigation
Basic first aid
Altitude-related symptoms
Weather assessment
Group management
Emergency response
For routes such as the Kuari Pass trek and Brahmatal trek, winter conditions can make trail management especially important. Snowfall, low temperatures, and changing weather require guides who know the terrain rather than simply following a fixed itinerary.
3. What Safety Measures Are Included?
Safety should never be treated as an optional feature of a trekking package.
Ask the trekking company to clearly explain its safety protocol before you pay your booking amount.
Depending on the trek and altitude, the team should have appropriate first-aid supplies and a system for handling altitude sickness, injuries, bad weather, and evacuation.
Important questions include:
Does the team carry a first-aid kit?
How are trekkers monitored at altitude?
What happens if somebody cannot continue?
Is there an emergency evacuation plan?
How does the team communicate in remote areas?
What happens if weather conditions make the planned route unsafe?
You should receive clear answers rather than vague statements such as “everything will be managed.”
In the Himalayas, conditions can change quickly. A responsible trekking company must be prepared to modify the itinerary when safety requires it.
4. What Is Included and Excluded in the Trek Cost?
A surprisingly cheap trek package can become expensive once additional charges start appearing.
Always request a detailed list of inclusions and exclusions before booking.
Check whether your package includes:
Accommodation
Camping equipment
Meals during the trek
Transportation
Trek leader and guides
Support staff
Permits and forest charges
Safety equipment
Porter or mule support, if applicable
Also ask about expenses that are not included.
For example, transport to the starting point, personal equipment rental, additional porter services, emergency evacuation, personal expenses, and accommodation before or after the trek may be charged separately.
Comparing trekking companies only by their advertised price can therefore be misleading. Compare the complete package instead.
5. What Is the Group Size?
Group size directly affects your trekking experience.
Very large groups can be difficult to manage on narrow trails and at campsites. They can also make it harder for guides to monitor individual trekkers.
Ask the company:
How many trekkers will be in my batch?
Then ask how many guides or support staff will accompany that group.
A well-managed group gives trekkers better access to guides and makes it easier for the team to identify someone who may be struggling with fatigue, cold, dehydration, or altitude.
This is especially valuable on treks such as the Ali Bedni Bugyal trek, where trekkers should have enough time and space to experience the remarkable alpine landscape without feeling like they are moving in a crowded procession.
6. How Do You Handle Altitude Acclimatization?
Altitude should never be underestimated.
As trekkers move higher, the amount of available oxygen decreases. Some people may experience headache, tiredness, loss of appetite, nausea, disturbed sleep, or other symptoms associated with altitude.
A professional trekking company should design its itinerary with altitude gain in mind rather than simply trying to complete the route as quickly as possible.
Before booking, ask:
What is the maximum altitude?
How quickly will we gain elevation?
How does the team monitor trekkers?
What happens if someone develops symptoms of altitude sickness?
Can the itinerary be modified when required?
The answer is particularly important when considering high-altitude routes such as the Roopkund trek.
Never choose a company that guarantees that altitude sickness “will not happen.” Individual responses to altitude vary, and responsible operators take that uncertainty seriously.
7. What Kind of Accommodation and Food Will Be Provided?
Accommodation and meals may sound like minor details when you are looking at photographs of Himalayan summits, but after several hours of trekking they become extremely important.
Ask exactly where you will stay.
Depending on the route, accommodation may include tents, guesthouses, or homestays.
If camping is involved, ask about:
Tent sharing
Sleeping arrangements
Toilet facilities
Campsite setup
Drinking water
Hygiene practices
Food is equally important because trekkers require adequate energy throughout the journey.
Ask how many meals are provided each day and whether the company can accommodate reasonable dietary requirements.
On a route such as the Valley of Flower trek, where trekkers spend several days walking through mountain terrain, proper meals, hydration, and rest play an important role in maintaining energy throughout the journey.
8. What Happens If the Weather Changes?
The Himalayan weather does not follow your booking confirmation.
Rain, snow, landslides, strong winds, trail damage, and sudden weather changes can affect even a carefully planned itinerary.
Ask the trekking company what happens if the scheduled route cannot be completed.
A responsible operator should prioritize the safety of trekkers rather than attempting to complete an itinerary simply because it was advertised.
This question is particularly important for seasonal treks.
For example, the experience of the Brahmatal trek can vary significantly depending on snowfall and winter conditions, while the Valley of Flower trek is closely connected to monsoon conditions and the flowering season.
Flexibility is therefore an essential part of professional Himalayan trekking operations.
9. Does the Company Follow Responsible Trekking Practices?
The Himalayas are environmentally sensitive.
As trekking becomes increasingly popular, waste generation, plastic pollution, campsite damage, and pressure on local ecosystems have become serious concerns.
Before booking, ask what the trekking company does to minimize its environmental impact.
Responsible practices can include:
Carrying non-biodegradable waste back from campsites
Avoiding unnecessary single-use plastic
Using established trails and campsites
Preventing littering
Respecting wildlife and vegetation
Working with local communities
Following forest and local regulations
Trekkers also have a responsibility to follow these practices.
Places such as Ali Bedni Bugyal are valuable not only because they are beautiful but because they are ecologically sensitive Himalayan landscapes. Protecting them should be part of every trekking experience.
10. What Is the Cancellation, Refund, and Trek-Change Policy?
This is one of the most commonly overlooked questions.
Himalayan trekking plans can change because of personal circumstances, weather, government restrictions, forest regulations, road closures, or other conditions beyond anyone’s control.
Before paying, read the company’s cancellation and refund policy carefully.
Ask:
How much is refundable after cancellation?
Does the refund amount depend on the cancellation date?
Can the booking be transferred?
Can the trek date be changed?
What happens if the trek is cancelled because of weather?
What happens if authorities restrict access to the route?
Are any charges non-refundable?
Get these details before booking rather than after a problem occurs.
This is particularly important for routes where government, forest, or environmental regulations may influence access.
Don’t Choose a Himalayan Trekking Company Based Only on Price
It is natural to compare prices when planning a trek. However, the cheapest package is not necessarily the best-value package.
A lower price can sometimes mean compromises in guide-to-trekker ratios, equipment quality, meals, campsite arrangements, transportation, support staff, or safety preparation.
Instead of asking only:
“How much does this trek cost?”
Ask:
“What exactly am I getting for this price?”
Compare safety standards, guide experience, group size, accommodation, food, transportation, equipment, permits, cancellation terms, and local expertise.
A Himalayan trek is an adventure where operational quality matters.
Choosing the Right Trek for Your Himalayan Adventure
The right trekking company is important, but choosing the right trek for your fitness level, season, and expectations matters just as much.
The Ali Bedni Bugyal trek is known for its vast alpine meadows and spectacular Himalayan surroundings.
The Roopkund trek is famous for its high-altitude landscape, challenging terrain, and the mystery associated with Roopkund Lake. Trekkers should always check the latest access rules and permitted route before planning the trek.
The Valley of Flower trek offers an entirely different experience, with monsoon-fed landscapes and an extraordinary variety of Himalayan flora.
The Brahmatal trek is particularly popular as a winter trekking experience, offering snowy trails and expansive mountain views.
The Kuari Pass trek combines forests, mountain landscapes, and impressive views of major Himalayan peaks, making it an excellent choice for trekkers looking to explore Uttarakhand’s high-altitude terrain.
Whichever trek you choose, preparation and the quality of your trekking team can make a major difference to your overall experience.
Why Trek with Roopkund Heaven?
At Roopkund Heaven, we believe a Himalayan trek should be more than simply reaching a destination.
Our focus is on creating well-managed trekking experiences supported by local knowledge, experienced teams, responsible trekking practices, and realistic guidance for trekkers.
Whether you are considering the Ali Bedni Bugyal trek, Roopkund trek, Valley of Flower trek, Brahmatal trek, or Kuari Pass trek, choosing an operator that understands Uttarakhand’s mountain environment can help you prepare more confidently for the journey.
Before booking any trek, ask questions. Understand the itinerary. Check what is included. Know the challenges involved. And most importantly, choose a trekking company that treats safety and responsible trekking as priorities.
Plan carefully. Ask the right questions. Choose responsibly.
Your Himalayan journey begins long before you step onto the trail – it begins with choosing the right people to take you there.
Uttarakhand Trekking Calendar 2027: Where to Trek Each Month of the Year and Know More About Them
Uttarakhand does not really have a single trekking season. The character of its trails changes almost every month. January can mean deep snow and frozen alpine lakes; April brings clearer trails and the first signs of spring; July and August transform the higher valleys into intensely green landscapes; September usually offers a combination of post-monsoon clarity and comfortable trekking temperatures; and October brings crisp autumn conditions before winter gradually returns.
That seasonal variation is exactly why choosing a trek only by its name or difficulty level is not enough. The same trail can feel completely different in February, August and October.
This Uttarakhand Trekking Calendar 2027 provides a month-by-month guide to help you understand where to trek, what conditions to expect, which trails are best avoided during certain periods, and how to choose the right Himalayan experience.
Important for 2027: Trek opening dates, forest permissions, protected-area access, weather-related closures and local regulations can change. Always confirm the latest official conditions before travelling, particularly for protected or environmentally sensitive routes such as Roopkund and the Valley of Flowers.
Uttarakhand Trekking Calendar 2027 at a Glance
Month
Recommended Trek Experiences
What to Expect
January
Brahmatal, Kuari Pass
Snow, sub-zero nights, winter landscapes
February
Kuari Pass, Brahmatal
Excellent snow trekking conditions
March
Kuari Pass, Brahmatal
Late-winter snow with gradually improving weather
April
Kuari Pass, lower-altitude Himalayan trails
Spring conditions and clearer trails
May
Ali Bedni Bugyal, Kuari Pass
Green meadows and comfortable trekking weather
June
Ali Bedni Bugyal, Valley of Flowers season begins
Early summer and access to higher trails
July
Valley of Flowers
Peak monsoon greenery and flowering season
August
Valley of Flowers, Hemkund Sahib
Richest monsoon landscapes and abundant flowers
September
Valley of Flowers, Ali Bedni Bugyal
Post-monsoon views and fewer crowds later in the month
October
Ali Bedni Bugyal and selected autumn treks
Clear mountain views and colder nights
November
Kuari Pass, Brahmatal season begins
Dry, cold conditions and early snow possibilities
December
Brahmatal, Kuari Pass
Established winter trekking season
January: Frozen Lakes and a True Himalayan Winter
January is for trekkers who deliberately want winter rather than simply tolerating it. Snow can cover large sections of the trail, temperatures fall considerably after sunset, and daylight hours are shorter.
Among Uttarakhand’s winter routes, Brahmatal is particularly attractive because the landscape combines forest sections, snow-covered clearings, mountain viewpoints and an alpine lake.
Brahmatal Lake in Winter
Seeing Brahmatal Lake in Winter is quite different from seeing the region during warmer months. Depending on recent weather and temperature, the lake may be partially or substantially frozen, while snow can cover the surrounding landscape.
The trek is also known for views towards prominent Garhwal peaks, particularly around the higher viewpoints.
Winter trekkers should nevertheless prepare for:
Sub-zero night temperatures
Snow or ice on the trail
Shorter daylight hours
Rapid weather changes
Slippery ascents and descents
A frozen lake is never guaranteed merely because a trek is undertaken in winter. Temperature, snowfall and recent weather ultimately determine the lake’s condition.
February: One of the Best Months for Kuari Pass
February is an excellent month for travellers specifically searching for a snow trek.
Kuari Pass Trek in February
A Kuari Pass Trek in February typically offers extensive winter scenery, particularly at higher elevations. Snow-covered forests, white ridgelines and views towards peaks such as Dronagiri, Nanda Devi and other Garhwal summits are among the principal attractions.
February is especially suitable for trekkers who want:
A genuine snow trekking experience
Large Himalayan mountain views
Forest and meadow landscapes under snow
A multi-day winter trek without attempting a technical expedition
Snow depth varies considerably from year to year. Fresh snowfall can also increase the physical difficulty of the trail, so the February version of Kuari Pass should not be treated as identical to its spring or autumn version.
March: Winter Begins to Loosen Its Grip
March is a transition month.
Higher sections of trails can still retain considerable snow, particularly during the first half of the month, while lower elevations begin moving towards spring.
Kuari Pass and Brahmatal can both remain attractive choices depending on snow and trail conditions.
The advantage of March is that trekkers may encounter winter landscapes while experiencing slightly longer and, at times, more comfortable trekking days than during January.
However, melting snow can create slushy or slippery sections. Good trekking footwear remains essential.
April: Spring Trekking Begins
April marks a noticeable seasonal shift in Uttarakhand. Snow begins retreating from many lower and mid-altitude sections, forests become more active, and daytime conditions are generally more comfortable.
Kuari Pass can be particularly interesting during this transition because trekkers may experience green lower sections while snow persists higher up.
April is suitable for people who want Himalayan mountain scenery but do not necessarily want the intense cold associated with January or February.
It is also a useful month for beginners preparing for longer high-altitude treks later in the year.
May: The Bugyal Season Starts Becoming Beautiful
By May, Uttarakhand’s alpine meadow landscapes begin changing dramatically.
One of the most important regions to consider during this period is the Ali-Bedni landscape.
Ali Bugyal and Bedni Bugyal are famous for their expansive high-altitude grasslands. When conditions are clear, these open meadows provide spectacular views of peaks including Trishul and Nanda Ghunti.
May can offer an attractive balance of:
Greener landscapes
Pleasant daytime trekking
Clearer mountain views
Less monsoon interference
Comfortable camping conditions
The precise accessibility of individual routes should still be checked before departure.
June: Early Summer and the Beginning of the Valley of Flowers Season
June is an important transition into Uttarakhand’s summer and monsoon trekking period.
The Valley of Flowers generally becomes accessible around the beginning of June, although the famous mass flowering display develops progressively rather than appearing immediately when the park opens.
The Valley of Flowers National Park is part of the Nanda Devi and Valley of Flowers UNESCO World Heritage landscape, making it both an ecological destination and a trekking experience.
For trekkers whose main priority is flowers, however, July and August are normally more rewarding than early June.
July: Valley of Flowers Reaches Its Most Famous Season
July changes the trekking equation in Uttarakhand.
Heavy rainfall makes many exposed mountain trails less desirable, but the same monsoon system creates the ecological conditions that make the Valley of Flowers extraordinary.
During the monsoon, the valley becomes intensely green and numerous flowering species emerge across different elevations and microhabitats.
Which Valley of Flowers Flowers Can You See?
The exact species visible depend on altitude, rainfall, temperature and the week of your visit. The wider region is known for Himalayan flowering plants such as primulas, potentillas, anemones, geraniums, balsams and several other alpine and sub-alpine species.
The floral composition changes through the season. Someone visiting in early July can therefore experience a different valley from someone arriving in mid-August.
Rare Himalayan Flowers: Look, Photograph, but Do Not Disturb
One reason botanical enthusiasts visit Uttarakhand is the opportunity to observe Rare Himalayan Flowers in their natural habitats.
The Himalaya contains highly specialised plant communities adapted to cold temperatures, short growing seasons, intense ultraviolet radiation and highly specific soil and moisture conditions.
Some plants are restricted to narrow ecological zones, making them particularly vulnerable to disturbance.
Responsible behaviour is therefore essential.
Do not pluck wildflowers, uproot plants or walk through flowering patches simply to obtain photographs. Stay on established trails wherever required and allow the ecosystem to remain exactly as you found it.
August: Flowers, Rain and Hemkund Sahib
August continues the peak monsoon character of the Valley of Flowers region.
Rainfall can be frequent, clouds can temporarily obscure mountain views, and roads in Uttarakhand may experience weather-related disruptions. In return, the landscape can be extraordinarily lush.
From Ghangaria, the two experiences are very different.
The Valley of Flowers route leads into a protected alpine valley filled with vegetation and seasonal blooms. Hemkund Sahib involves a considerably steeper ascent to the high-altitude Sikh pilgrimage site beside Hemkund Lake.
Combining both provides a strong mixture of ecology, trekking and spiritual significance.
Because Hemkund Sahib lies at substantially higher altitude than Ghangaria, trekkers should not underestimate the ascent simply because it is completed as a day excursion.
Monsoon Trek Packing List
A carefully prepared Monsoon Trek Packing List can make the difference between an uncomfortable trek and a manageable one.
For a monsoon trek in Uttarakhand, consider carrying:
Waterproof or water-resistant trekking shoes with strong grip
Rain jacket or poncho
Backpack rain cover
Quick-drying trekking trousers
Moisture-wicking base layers
Warm insulating layer
Spare socks
Waterproof storage for electronics and documents
Trekking poles
Reusable water bottle
Personal medication and basic first-aid supplies
Headlamp with spare batteries
Sun protection
Insect protection where appropriate
Lightweight towel
Biodegradable personal-care essentials
Small waste bag for carrying personal waste back
Avoid relying only on a backpack rain cover. Important electronics, clothing and documents should have an additional waterproof layer inside the backpack.
September: One of Uttarakhand’s Most Interesting Trekking Months
September is a transition from monsoon towards autumn.
Rainfall generally begins declining as the month progresses, vegetation remains green, and periods of clear weather can produce impressive mountain visibility.
Yes—but it should not be sold as the same experience as peak flowering season.
By September, the composition and abundance of blooms begin changing. Trekkers may find fewer flowers than during the July-August peak, but the valley can still be attractive because of its greenery, waterfalls, quieter atmosphere and changing post-monsoon landscape.
People travelling primarily for maximum floral density should generally favour July or August. Travellers prioritising lower crowds and the broader Himalayan landscape may find September appealing.
For a reasonably fit person with some trekking preparation, the route can be manageable. Beginners should nevertheless train before travelling.
Cardiovascular endurance, leg strength and the ability to walk uphill for several hours matter more than ordinary city walking fitness.
October: Clear Skies and Classic Autumn Trekking
October is one of Uttarakhand’s strongest months for mountain visibility.
The monsoon has usually withdrawn, humidity falls, skies can become clearer, and nights begin getting progressively colder.
Ali-Bedni landscapes can remain attractive during the autumn period, subject to route access and local regulations.
Trekkers who care more about distant mountain views than lush monsoon vegetation often prefer autumn conditions.
October also requires better cold-weather preparation, particularly at campsites after sunset.
November: The Mountains Move Back Towards Winter
November is another transition period.
Temperatures fall sharply, vegetation begins losing some of its monsoon richness, and early snowfall can occur at higher elevations.
Kuari Pass can again become an interesting option. Depending on the year, trekkers may encounter dry autumn trails, patches of snow or the beginning of more sustained winter conditions.
Brahmatal’s winter season also begins approaching.
The benefit of November is often clearer weather; the trade-off is increasingly cold nights.
December: Winter Trekking Returns
By December, winter trekking is again one of Uttarakhand’s principal attractions.
Brahmatal and Kuari Pass become strong choices for travellers seeking snow landscapes.
December can offer:
Snow-covered trails
Cold, clear mornings
Winter mountain panoramas
Forest trekking
Snow camping experiences
Christmas and New Year periods can also be comparatively busy on popular winter routes, so trekkers looking for quieter trails may prefer early or mid-December.
Brahmatal Trek from Dehradun: How Should You Plan It?
Travellers searching for a Brahmatal Trek from Dehradun should understand that Dehradun is a transport gateway rather than the actual trailhead.
Brahmatal is approached through the Kumaon-Garhwal mountain road network towards the Lohajung region, with the precise pickup and operational route depending on the trekking itinerary.
If starting in Dehradun, keep a separate travel day or sufficient buffer for reaching the trek’s roadhead.
Mountain road journeys can take significantly longer than distances on a map suggest. Weather, traffic, roadwork and landslide-related restrictions can all affect travel time.
Roopkund Skeleton Lake: Why Is It So Famous?
Few trekking destinations in India have generated as much curiosity as Roopkund Skeleton Lake.
Roopkund is a high-altitude glacial lake situated at roughly 5,000 metres in Uttarakhand’s Chamoli region. It became internationally famous because human skeletal remains were discovered around the lake.
For decades, different explanations were proposed for the deaths.
Modern scientific investigation has made the story considerably more complex. Research involving ancient DNA and other archaeological techniques indicated that the individuals represented more than one genetically distinct group and were not necessarily the victims of a single event.
That makes Roopkund more than a trekking destination. It is also an important archaeological and scientific site within an ecologically fragile high-altitude environment.
Roopkund Trek Best Time: When Should You Plan It?
Historically, discussions about Roopkund Trek best time generally centred around the pre-monsoon and post-monsoon trekking windows.
Late spring and early summer offered greener meadows and comparatively favourable access, while the post-monsoon period was valued for clearer skies and expansive Himalayan views.
However, the question can no longer be answered by weather alone.
Roopkund lies in an environmentally sensitive landscape, and access has been subject to restrictions and regulatory changes. For 2027, the first question should therefore be whether the intended route is legally and officially open—not simply whether the weather is suitable.
Roopkund Trek in Monsoon: Why It Is Usually a Poor Choice
The Valley of Flowers is specifically valued for a monsoon-driven ecological phenomenon. Roopkund, by contrast, involves a high-altitude route where persistent rainfall can significantly increase operational risk.
Potential problems include:
Slippery trails
Mud
Reduced visibility
Landslide-prone approach roads
Difficult river or stream crossings
Unstable weather
Reduced mountain visibility
Even if access regulations permit trekking in a particular year, the monsoon is generally not the season to select simply because the landscape is green.
Brahmatal vs Roopkund Trek: Which Is Better?
The Brahmatal vs Roopkund Trek comparison is interesting because the two experiences are fundamentally different.
Choose Brahmatal if you want:
A recognised winter trekking experience
Snow-covered forests
A high-altitude lake
Strong Himalayan viewpoints
A comparatively accessible multi-day trekking format
Consider Roopkund only if officially permitted and you want:
A much higher-altitude objective
A historically significant route
Expansive bugyals
A physically more demanding experience
The archaeological story associated with Skeleton Lake
The key difference is regulatory status. Brahmatal can be evaluated largely in terms of season, weather and trek difficulty. Roopkund additionally requires careful verification of current access regulations.
Roopkund Trek Reopens 2026: What Does It Mean for 2027?
Searches for Roopkund Trek Reopens 2026 increased significantly because trekkers wanted to know whether the famous trail would again become accessible after years of restrictions.
For anyone planning 2027, however, a headline announcing reopening should not automatically be interpreted as unrestricted access to the lake.
Roopkund lies within a fragile alpine environment, and any trekking access can be subject to forest regulations, route restrictions, group controls, camping rules, local administrative instructions and conservation requirements.
Before planning a 2027 departure, verify:
The exact route currently permitted.
Whether trekkers can legally approach the lake itself.
Where camping is permitted.
Current group-size restrictions.
Forest or protected-area permissions.
Waste-management requirements.
Any seasonal closure or weather advisory.
Roopkund Trek Supreme Court Order 2026: Verify the Exact Order
Legal and environmental updates are often simplified when they circulate through social media, trekking groups and secondary websites. A claim that a court order has “reopened Roopkund” can omit important conditions concerning ecological protection, route access, camping or implementation by state authorities.
For 2027 planning, trekkers and operators should rely on the actual judicial order and subsequent notifications from the competent Uttarakhand authorities rather than treating a social-media summary as the final operating rule.
This is particularly important because court directions and the on-ground trekking framework implemented afterward are not necessarily the same document.
Valley of Flowers Trek 2026: What It Tells Us About Planning for 2027
The Valley of Flowers Trek 2026 season provides a useful reference for understanding the established trekking pattern, but 2027 travellers should still confirm that year’s official opening and closing dates.
The park is a protected landscape, and access is regulated. Overnight stays inside the Valley of Flowers itself are not part of the normal trekking model; Ghangaria serves as the principal trekking base.
The conventional route is:
Haridwar/Rishikesh → Joshimath region → Govindghat → Pulna → Ghangaria → Valley of Flowers
Ghangaria can also be used for the Hemkund Sahib excursion.
The Valley of Flowers is part of the UNESCO-listed Nanda Devi and Valley of Flowers National Parks landscape and should be treated as a protected ecological destination rather than simply another meadow trek.
How to Reach Valley of Flowers by Road
Travellers searching How to Reach Valley of Flowers by Road should understand one important point: there is no motorable road directly into the Valley of Flowers.
A typical approach from the plains follows the mountain road network towards the Joshimath-Govindghat region. Road access takes travellers to the vicinity of the trekking approach, after which the journey continues on foot through the Pulna-Ghangaria corridor.
From Ghangaria, trekkers enter the Valley of Flowers on foot.
During monsoon months, road travel deserves particular attention. Landslides, rockfall, heavy rain and road maintenance can cause delays, so avoid building an itinerary around extremely tight transfer times.
How to Choose the Right Trek Month in Uttarakhand
Instead of asking, “What is the best trek in Uttarakhand?”, ask:
What do I want to see?
For snow, consider December to March.
For Valley of Flowers flowers, focus primarily on July and August.
For green bugyals, late spring and the post-monsoon period can be excellent depending on the route.
For clear mountain panoramas, post-monsoon September and October are often strong choices.
For a winter lake experience, Brahmatal is an obvious candidate.
For Roopkund, check official access first and season second.
This distinction is important because Uttarakhand’s trekking calendar is driven by altitude, precipitation, snow accumulation, flowering cycles and protected-area regulations—not simply by tourist seasons.
Final Thoughts: There Is a Trek for Almost Every Season
The biggest advantage of trekking in Uttarakhand is its seasonal diversity.
February can give you a snow-covered Kuari Pass. July and August can transform the Valley of Flowers into one of India’s most remarkable alpine botanical landscapes. September can offer green meadows around Ali Bedni Bugyal, while December brings Brahmatal back into its winter character.
The most important principle for the Uttarakhand Trekking Calendar 2027 is therefore simple: match the trek to the season rather than forcing a particular trail into the month you happen to be free.
And for environmentally sensitive routes—especially Roopkund—always place official access rules ahead of old itineraries, blogs or assumptions based on previous trekking seasons.
Frequently Asked Questions About Uttarakhand Trekking in 2027
1. Which is the best month for trekking in Uttarakhand?
There is no single best month. April-May and September-October are excellent for many non-winter treks, while December-March is better for snow treks. July-August is particularly important for the Valley of Flowers.
2. Which Uttarakhand trek is best in January?
Brahmatal is one of the better-known winter choices. Kuari Pass can also be considered depending on snowfall and trail conditions.
3. Is Kuari Pass Trek in February worth doing?
Yes. A Kuari Pass Trek in February is particularly suitable for trekkers seeking snow, winter forests and major Himalayan views. Fresh snowfall can make the route more demanding.
4. Is Brahmatal Lake frozen in winter?
It can freeze partially or extensively during sufficiently cold periods, but the condition of Brahmatal Lake in Winter depends on recent temperature and weather. A completely frozen lake should never be guaranteed.
5. Can beginners do the Brahmatal Trek?
Fit beginners commonly undertake Brahmatal, but winter conditions add difficulty. Prior physical preparation, suitable equipment and realistic pacing are important.
6. How can I plan a Brahmatal Trek from Dehradun?
For a Brahmatal Trek from Dehradun, first travel towards the Lohajung side of Uttarakhand according to your operator’s road itinerary. Keep adequate buffer time because mountain transfers are long and can be affected by road conditions.
7. When is the best time for Valley of Flowers?
For abundant flowers, July through August is generally the most important period. The exact floral display varies every year with snowfall, rainfall and temperature.
8. Is Valley of Flowers in September worth visiting?
Yes. Valley of Flowers in September can still be beautiful, although travellers should expect a different floral profile and generally fewer blooms than during the July-August peak.
9. Which months have the most flowers in Valley of Flowers?
Valley of Flowers in July and August generally provides the strongest flowering experience. Different species bloom at different stages, so there is no single date when every flower is simultaneously at peak bloom.
10. Can Valley of Flowers and Hemkund Sahib be done together?
Yes. Valley of Flowers with Hemkund Sahib is a popular combination because Ghangaria acts as a base for both routes. Hemkund Sahib is considerably higher and involves a steep ascent, so adequate acclimatisation and fitness remain important.
11. How do I reach Valley of Flowers by road?
For anyone researching How to Reach Valley of Flowers by Road, vehicles can take you towards Govindghat/Pulna depending on current road arrangements. The final approach to Ghangaria and the Valley itself requires trekking.
12. What is Ali Bedni Bugyal Trek difficulty?
Ali Bedni Bugyal Trek difficulty can broadly be considered moderate for a prepared trekker, but altitude gain, consecutive walking days and sustained ascents make physical preparation necessary.
13. Is Ali Bedni Bugyal Trek in September good?
Yes. An Ali Bedni Bugyal Trek in September can provide green post-monsoon meadows, improving visibility and impressive views towards the surrounding Himalayan peaks.
14. Why is Roopkund called Skeleton Lake?
The name Roopkund Skeleton Lake comes from the human skeletal remains found around the high-altitude lake. Scientific studies suggest the remains have a more complex history than the older theory that everyone died during one catastrophic event.
15. What is the Roopkund Trek best time?
Historically, Roopkund Trek best time has been associated with pre-monsoon and post-monsoon periods. For 2027, however, legal access and conservation regulations must be verified before choosing dates.
16. Is Roopkund Trek in Monsoon recommended?
Generally, a Roopkund Trek in Monsoon is not the preferred choice. Heavy rainfall can increase trail slipperiness, landslide risk, road disruption and poor visibility.
17. Has the Roopkund Trek reopened?
Reports around Roopkund Trek Reopens 2026 should be checked against the latest government, forest department and applicable judicial directions before planning a 2027 trek. Reopening does not necessarily mean unrestricted access to every part of the historical route.
18. What is the Roopkund Trek Supreme Court Order 2026?
When researching the Roopkund Trek Supreme Court Order 2026, consult the actual judicial record and subsequent state implementation orders. Secondary reports can oversimplify what a court directed and what trekking activities are subsequently permitted.
19. Which is better: Brahmatal vs Roopkund Trek?
In a Brahmatal vs Roopkund Trek comparison, Brahmatal is better suited to travellers seeking a conventional winter trek. Roopkund is a higher and historically significant route whose accessibility depends heavily on current environmental regulations.
20. What should I include in a Monsoon Trek Packing List?
A good Monsoon Trek Packing List should include proper trekking shoes, rain protection, quick-drying clothing, trekking poles, waterproof internal storage, spare socks, warm layers, a headlamp and personal medical essentials.
21. Can I pluck rare Himalayan flowers for photographs or souvenirs?
No. Rare Himalayan Flowers should be observed without disturbing them. In protected landscapes such as the Valley of Flowers, trekkers should remain on designated routes and avoid damaging or removing vegetation.
22. Which is the best month for first-time trekkers in Uttarakhand?
April-May and September-October are often easier seasonal windows for beginners because they avoid the harshest winter conditions and the core monsoon period. The right month still depends on the specific trek.
23. Which Uttarakhand trek is best for snow in 2027?
Brahmatal and Kuari Pass are two major options to consider for winter snow trekking, particularly between December and March. Actual snow cover cannot be guaranteed months in advance.
24. Which month gives the clearest Himalayan views?
October is often excellent for clear mountain visibility after the monsoon, while late September can also provide outstanding views when the weather stabilises.
25. Do I need a guide for trekking in Uttarakhand?
It depends on the route and current regulations. For high-altitude, winter, protected-area or unfamiliar trails, trekking with experienced local support is strongly advisable. Some routes may also have specific registration, permit or guide requirements.
Kuari Pass Trek in February: Is It a Good Time for a Snow Trek?
If walking through snow-covered oak forests, white alpine meadows and spectacular Himalayan landscapes sounds like your idea of a winter adventure, the Kuari Pass Trek in February deserves serious consideration.
Located in the Chamoli district of Uttarakhand, the Kuari Pass Trek is one of the best-known Himalayan trails for trekkers who want a genuine winter experience without attempting a technical mountaineering expedition. Kuari Pass reaches approximately 3,815 metres (12,516 ft), and Uttarakhand Tourism classifies the trek as moderate.
February is particularly interesting because the higher sections of the trail can remain covered in snow. It is colder and more demanding than a normal autumn trek, but the reward is a dramatically different Himalayan landscape.
So, is February a good time for Kuari Pass?
Yes—February can be an excellent month for a Kuari Pass snow trek, provided you are properly equipped, physically prepared and trekking with an itinerary suited to winter conditions.
Here is everything you should know before planning it.
Kuari Pass Trek Details at a Glance
Here are the essential Kuari Pass Trek details:
Location: Chamoli, Uttarakhand Region: Garhwal Himalayas Maximum Altitude: Approx. 3,815 m / 12,516 ft Difficulty: Moderate, but winter snow increases difficulty Official Trek Distance: Around 20 km on Uttarakhand Tourism’s listed four-day route Ideal For: Beginners with good fitness and experienced trekkers Famous For: Snow trekking, forests, bugyals and panoramic Himalayan views Major Base Region: Joshimath/Auli Popular Winter Approach: Joshimath region → roadhead → Khullara/Kuari Pass sector
Uttarakhand Tourism currently lists a four-day Kuari Pass route covering approximately 20 km. However, total walking distance varies considerably according to the route, roadhead and itinerary selected.
Why Do the Kuari Pass Trek in February?
February transforms Kuari Pass into a completely different landscape.
Forests that appear green during other seasons can become lined with snow. Open sections turn white, and the surrounding Himalayan peaks appear especially dramatic against the winter landscape.
The biggest reasons for choosing February include:
Good possibility of substantial snow
Snow-covered forest trails
Beautiful winter campsites
Panoramic Himalayan views
A genuine winter trekking experience
Fewer crowds than some peak-season treks
Excellent landscape photography
Regional trekking information describes February around Kuari Pass as cold and snow-covered, with indicative temperatures around 4°C maximum and -8°C minimum at higher elevations, although actual conditions vary significantly with altitude and weather.
This is exactly why February attracts trekkers specifically looking for snow.
Does Kuari Pass Have Snow in February?
Usually, February is firmly within the winter snow season around the higher Kuari Pass trail.
Snow accumulation depends on the year’s western disturbances and snowfall pattern, so no operator can responsibly guarantee the exact depth of snow months in advance.
Some years receive heavier snowfall than others.
Fresh snowfall can also temporarily make the route more difficult or force trek leaders to alter the itinerary.
Therefore, there is an important distinction:
February is a good month to seek snow, but reaching Kuari Pass itself can never be guaranteed if weather or trail safety deteriorates.
Safety should always take priority over reaching a particular point.
Kuari Pass Trek Best Time
The Kuari Pass trek best time depends entirely on what type of experience you want.
December to February – For Snow
Choose this period if your main objective is winter trekking and snow-covered landscapes.
February can be particularly attractive because the trail may hold accumulated winter snow while daylight gradually begins increasing compared with midwinter.
March to April – Snow + Spring Transition
Snow may remain in higher sections while lower forests gradually begin transitioning toward spring.
April to June – Pleasant Trekking Conditions
This period is suitable for trekkers who prefer comparatively milder weather and green landscapes rather than deep winter snow.
September to November – Clear Himalayan Views
Post-monsoon and autumn are excellent for clear skies and expansive mountain views.
So, if your specific goal is a snow trek, February is one of the strongest candidates for the Kuari Pass trek best time.
What Makes Kuari Pass Famous?
Kuari Pass is historically associated with what became known as the Lord Curzon Trail.
The trek is especially famous for its views of major Garhwal Himalayan peaks.
Depending on weather, route and viewpoint, trekkers can see mountains such as:
Nanda Devi
Dronagiri
Kamet
Chaukhamba
Trishul
Neelkanth
Hathi Parbat
The combination of Himalayan panoramas, forests, meadows and manageable altitude has helped make the Kuari Pass Trek popular among both first-time and experienced trekkers.
Kuari Pass Trek Starting Point
There is no single answer to the Kuari Pass trek starting point because Kuari Pass can be approached through different routes.
Historically, several routes have been used to access the pass.
The broader trekking hub is Joshimath, while approaches may use places around Auli, Dhak, Tugasi, Tapovan or other roadheads depending on the itinerary.
Uttarakhand Tourism’s current four-day route begins its trekking section from Karchi, while other commonly published itineraries use Dhak or Auli-side approaches.
Therefore, when booking a Kuari Pass trek package, always ask the operator for the exact roadhead and trekking route.
Kuari Pass Trek Distance
The Kuari Pass trek distance varies according to the route.
Uttarakhand Tourism currently lists a four-day route of approximately 20 km, divided across Karchi, Akhrotghetta, Khullara, Kuari Pass, Tali and Auli.
Other itineraries can be longer.
For example, routes starting through Dhak and involving additional camps or return sections may produce a substantially greater total walking distance.
This is why you may see different numbers when searching for the Kuari Pass trek distance online.
Before booking, check whether the advertised distance refers to:
Complete trekking distance
One-way distance
Distance to Kuari Pass only
Auli route
Dhak/Karchi route
Road plus trekking distance
There is no contradiction simply because two itineraries quote different distances—they may be following different routes.
Kuari Pass Trek Map
A simplified Kuari Pass trek map for one of the winter approaches can be understood as:
Published trekking information describes four principal approaches, including the old Curzon Trail, an Auli–Gorson route, a Joshimath–Tugasi–Khullara approach and a Tapovan–Khullara route.
This explains why a single Kuari Pass trek map found online may look different from the itinerary offered by your trekking company.
Can Beginners Do Kuari Pass in February?
Yes, but being a beginner does not mean arriving without preparation.
A first-time Himalayan trekker should ideally have:
Good cardiovascular fitness
Ability to walk for several hours
Appropriate winter trekking shoes
Proper thermal layering
Experience carrying a daypack
Willingness to follow the trek leader’s instructions
If you are completely inactive, start preparing several weeks before departure.
Brisk walking, jogging, stair climbing and basic leg-strength exercises can make the experience considerably more comfortable.
February Weather on Kuari Pass Trek
February conditions are cold.
Regional trekking information gives an indicative February range of around 4°C during the day to -8°C at night at higher elevations, with snow cover expected.
Treat these only as broad seasonal indicators.
Actual temperature can differ according to:
Altitude
Campsite
Wind
Cloud cover
Fresh snowfall
Time of day
Wind chill can also make conditions feel considerably colder than the measured air temperature.
What to Pack for Kuari Pass in February
Winter equipment is essential.
Your packing list should include:
Waterproof trekking shoes
Thermal base layers
Fleece jacket
Insulated/down jacket
Waterproof outer shell
Trekking trousers
Warm gloves
Woollen cap/beanie
Neck gaiter or buff
Several pairs of trekking socks
Sunglasses
Sunscreen
Trekking poles
Headlamp
Water bottle
Personal medication
Backpack with rain/snow protection
Gaiters where conditions require them
Your trek operator should advise whether microspikes or other traction equipment is required for the current snow conditions.
Do not compromise on footwear for a February trek.
Kuari Pass Trek Package: What Should You Check?
A reliable Kuari Pass trek package should clearly mention:
Trek duration
Exact trekking route
Starting and ending points
Accommodation
Meals
Trek leader
Local guide/support team
Camping equipment
Safety equipment
Forest/entry permissions where applicable
Transportation
Equipment rental charges
Emergency procedures
Inclusions and exclusions
For February departures, also ask what happens if heavy snowfall prevents the group from reaching Kuari Pass.
A responsible company should prioritise safety rather than promising the pass regardless of conditions.
Is February Better Than December for Kuari Pass?
Both months offer winter experiences, but conditions differ.
December represents the beginning of the main winter period, and snow accumulation depends heavily on when significant snowfall begins.
By February, the higher trail has had more time to accumulate winter snow.
Therefore, trekkers whose main objective is snow may find February particularly attractive.
However, deeper snow can also make February more demanding.
Kuari Pass vs Kedarkantha in February
Both are popular Uttarakhand winter treks, but the experiences are different.
Kedarkantha is famous for its summit-style objective and is extremely popular among first-time winter trekkers.
Kuari Pass is particularly impressive for its enormous Himalayan panorama and pass-crossing atmosphere.
Choose Kuari Pass if you prioritise:
Views of major Garhwal peaks
Forest landscapes
A historic trekking route
Snow trekking
A comparatively expansive Himalayan experience
Choose based on your fitness and expectations rather than simply selecting whichever trek appears easier.
Is the Kuari Pass Trek in February Worth It?
Yes.
For trekkers specifically looking for snow, February can be one of the most rewarding periods for the Kuari Pass Trek.
The landscape can include snow-covered forests, white meadows and spectacular Himalayan panoramas.
If those elements are in place, Kuari Pass can provide an outstanding introduction to Himalayan snow trekking.
Final Verdict: Should You Do the Kuari Pass Trek in February?
If your goal is a genuine Himalayan snow trek, Kuari Pass in February is absolutely worth considering.
At around 12,516 ft, the trek offers the excitement of winter trekking without reaching the extreme elevations associated with major Himalayan expeditions.
February’s biggest attraction is simple: snow.
The same forests, meadows and ridges that define Kuari Pass during other seasons can transform into a white Himalayan landscape. Combined with views toward peaks such as Nanda Devi, Dronagiri, Kamet and Chaukhamba, this makes the trek particularly rewarding.
Before choosing a Kuari Pass trek package, however, check the exact Kuari Pass trek distance, study the Kuari Pass trek map, confirm the Kuari Pass trek starting point, understand the operator’s winter safety procedures and choose a realistic Kuari pass trek itinerary.
For travellers planning the Kuari pass trek from Delhi, allow enough buffer time for winter road conditions as well.
If you are fit, properly equipped and comfortable with cold conditions, February isn’t merely a possible time for Kuari Pass.
It can be one of the most memorable times to experience it.
Important FAQs About Kuari Pass Trek
1. Is February a good time for Kuari Pass Trek?
Yes. February is an excellent option if your priority is snow. Higher parts of the Kuari Pass Trek can remain snow-covered, creating a classic winter trekking experience.
2. Is there snow on Kuari Pass in February?
Snow is normally expected on the higher sections during February, but exact snow depth depends on that year’s weather and recent snowfall.
3. What is the Kuari Pass trek best time for snow?
December to February is generally the primary winter window. If substantial accumulated snow is your main objective, January and February are particularly attractive, although conditions can also be more challenging.
4. What is the Kuari Pass trek distance?
Uttarakhand Tourism currently lists its four-day Kuari Pass route at approximately 20 km. Other routes and commercial itineraries can be longer, so the Kuari Pass trek distance depends on the route selected.
5. What is the Kuari Pass trek starting point?
The Kuari Pass trek starting point depends on the route. Joshimath is the principal base hub, while actual trekking may begin from the Karchi/Dhak/Auli/Tapovan side depending on the itinerary. Uttarakhand Tourism’s currently listed four-day route begins at Karchi.
6. What is the height of Kuari Pass?
Kuari Pass reaches approximately 3,815 metres or 12,516 feet according to Uttarakhand Tourism.
7. Is Kuari Pass Trek difficult?
The trek is officially classified as moderate, but snow and sub-zero temperatures can make February considerably more challenging than dry-season conditions.
8. Can beginners do Kuari Pass Trek in February?
Fit beginners can attempt it with proper winter gear, preparation and experienced trekking support. Completely unprepared first-time trekkers may find deep snow and cold conditions difficult.
9. How many days are required for the Kuari Pass Trek?
The trekking section can vary from around four days upward depending on the route. When transportation from Rishikesh or Delhi is included, packages commonly require approximately 6–8 days.
10. What does the Kuari Pass trek map look like?
A simplified Kuari Pass trek map for a popular approach is:
11. What should a Kuari Pass trek package include?
A good Kuari Pass trek package should include accommodation, trekking meals, experienced guides or trek leaders, camping arrangements, safety equipment and clearly stated transport and permit arrangements.
12. How can I plan the Kuari Pass trek from Delhi?
For a Kuari pass trek from Delhi, travel first toward Rishikesh/Haridwar and then continue by road to Joshimath. From there, local transportation takes you toward the selected trek roadhead.
13. What is the standard Kuari pass trek itinerary?
A common winter Kuari pass trek itinerary includes arrival at Joshimath, transfer to the trek starting point, gradual ascent through forest camps toward Khullara, an attempt toward Kuari Pass, descent and return to Joshimath.
14. How cold is Kuari Pass in February?
Regional seasonal data indicates temperatures can fall to around -8°C at higher elevations, although actual temperatures and wind chill vary considerably.
15. Is Kuari Pass safe in February?
It can be undertaken safely when weather and trail conditions are suitable and the group has appropriate equipment and experienced leadership. Fresh snowfall, ice or severe weather can make sections unsafe, so route decisions should be made locally.
16. Can Kuari Pass be reached after heavy snowfall?
Not always. Deep snow, avalanche exposure, poor visibility or dangerous trail conditions can force trek leaders to turn back. Reaching the pass should never take priority over group safety.
17. Why is Kuari Pass called Lord Curzon Trail?
The route became historically associated with Lord Curzon following his journey through the region during the British era, which is why Kuari Pass is still widely referred to as the Lord Curzon Trail.
Limited-time Trek Assistance
Plan Your Next Himalayan Escape
Share your details and our trek team will call you with routes, dates, and best offers.